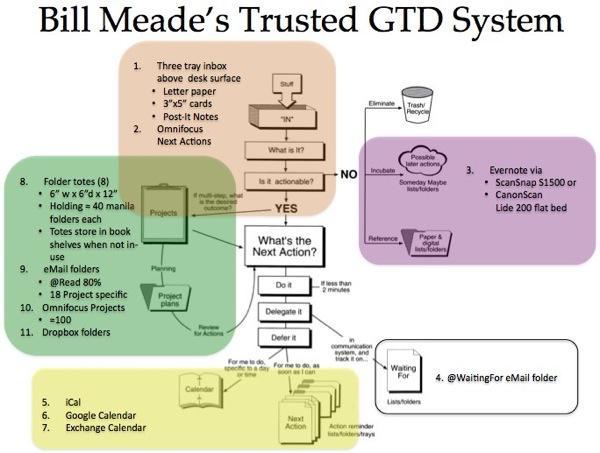
In this post, I’d like to dissect what I like about my current GETTING THINGS DONE desk, how it makes me feel, how it helps flow/mind-like-water, and how somehow, it magically helps me get a ton of work done. See the previous Before/After post to get a fuller visual on my complete trusted system.
Desk 3.0 [*Note* Desk 4.0 has its own post and can be seen here]
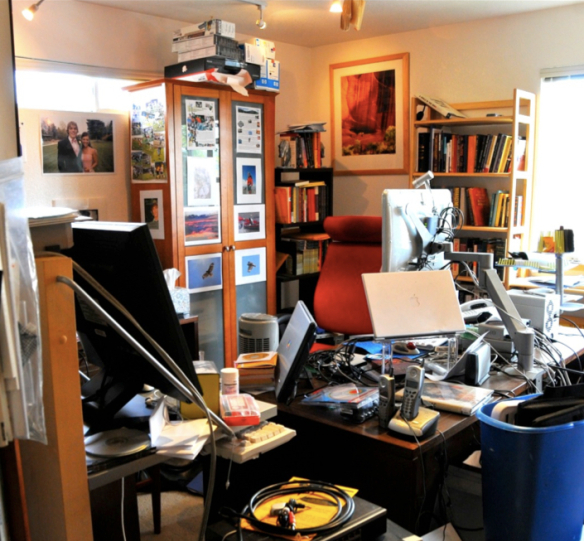
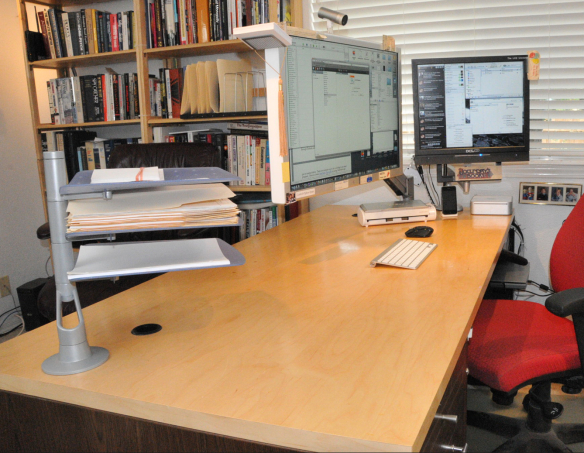
OK, here is a picture of my 3rd generation GTD desk which includes the legs. The rest of this post is a discussion of the elements of the perfect GTD desk.
- Element #1: Clear desk surface
The longer I do GTD, the more I find that I need to spread paper out on the surface of my desk to organize it. I keep parallel project folders: in atoms making up manilla folders, and in bits in Omnifocus projects. I write one idea, one piece of paper into either atoms or bits, and I organize the pieces of paper on the surface of my desk. It is just invaluable for me to put my ideas across the desk surface and then ask myself what the individual ideas are trying to tell me.
In addition, a clear desk surface lets you take a nice butcher block sized piece of paper to mind-map when you are kicking off a natural project management event.
Requirements for a clear desk are:
- Get the monitor on an arm that clears your desk (I use the Innovative 7500-hd-1500 arm because I’m holding 24 and 27 pound iMacs up. I attempted to link to Amazon.com for this product but the links are not working, I bought my most recent arm from Seaboom.com as it was $65 to $110 cheaper than Amazon. The three models at SeaBoom do not have pictures, but I figured out their colors and have a guide herethat you can use to pick your color.).
- Consider switching to a 27″ all-in-one computer (Mac, PC), makes a clean desk easy
- If you can’t swing an all-in-one, think hard about why your brain is not worth having a high resolution 27″ in monitor (Mac, PC). Do you cut from one window and paste into another for a living? 27″ monitors double efficiency!
- Get a wireless mouse, and
- Wireless keyboard (Mac, PC) so you can move keyboard and mouse off the desk and using the surface for your brain’s organizing pleasure.
- Resurface the desk, early and often. I’ve had original veneer, maple veneer, and currently, a $45 sheet of Formica (works great as a whiteboard!) on the surface of my desk. On my too-dark, too-depressing desk at home, I’ve resurfaced with whiteboard contact paper. Amazon has a veritable zoo of contact papers (easy on, easy off if you don’t like them) which allow your brain to employ whimsy to please itself as you work. Experiment and enjoy!
I look forward to the day when I can remove the telephone from my desk! I currently do about 90% of my phone calling with Skype and a wireless headset. I’ve thought about suspending the computer from the ceiling or from a cart that can be driven away from the desk to leave the desk space 100% analogue, but these are not currently practical given all the cables that have to be run.
- Element #2: Big desk surface
The best data I’ve seen on the surface area needed for information workers comes from Demarco and Lister’s book Peopleware.
Before drawing the plans for its new Santa Teresa facility, IBM violated all industry standards by carefully studying the work habits of those who would occupy the space. The study was designed by the architect Gerald McCue with the assistance of IBM area managers. Researchers observed the work processes in action in current workspaces and in mock-ups of proposed workspaces. They watched programmers, engineers, quality control workers, and managers go about their normal activities. From their studies, they concluded that a minimum accommodation for the mix of people slated to occupy the new space would be the following: 100 square feet of dedicated space per worker 30 square feet of work surface per person
DeMarco, Tom; Lister, Timothy R. (2010-04-15). Peopleware: Productive Projects and Teams (Kindle Locations 812-818). Dorset House Publishing. Kindle Edition.
30 square feet of work surface is H-U-G-E. My desk is 34″ deep, so to have 30 square feet of work area, my desk would need to be 10.5′ long! As my desk is merely 6′ long, I’m coming up short with a 17 square foot desk. I forecast that GTD will be adding some desk space to my office before too long. But for now, I’m squeaking by with a single work surface and living 13 square feet below my potential. :-)
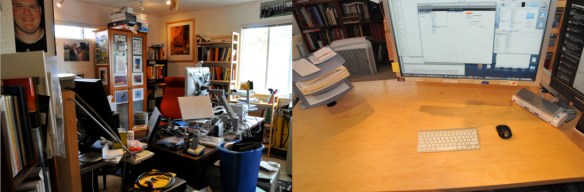
Another interesting aside is how many of my students are trying to live on tiny desks. Here’s Paulina Menchaka’s before and after desks (Paulina has kindly granted me permission to share these pictures). See if these pictures feel the same or different when you think about sitting down to work at these desks?

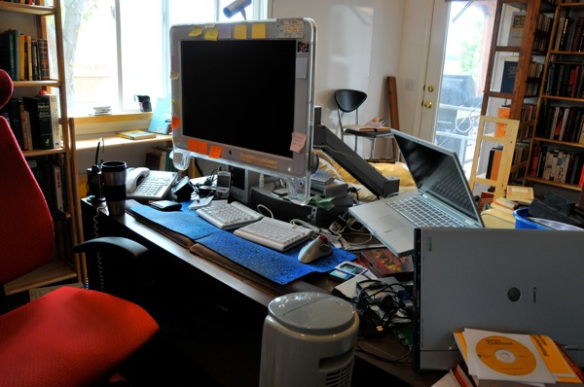
Here is what my desk looks like today. The mouse and keyboard can be moved out of the way, and the monitor can be pushed back to free up desk surface.
Summary, you need elbow room to think. You need to work with your entire brain, that means spreading things out in front of it, moving things around, giving the brain time to compost, and then listening as your subconscious bubbles up ideas. No substitute for lots of work surface and unrestricted access to that surface.
- Element #3: Slide-to-side room
I think it is required that you have the ability to roll your chair to slide sideways across your desk. This is required first, because it gives you a sense of freedom not having your knees crowded from both sides (John Niebergall, you know who you are!). Second, as projects are underway, new projects have a way of finding their way on to your desk. With a clear surface and sideways sliding room, you can be practically opportunistic in sliding sideways and setting up a 2nd (and sometimes a 3rd) project that you have to run in parallel with your starting project. I just get a sense of release when I look at a desk that is flexible allowing side to side sitting. Open-ness side to side also lets you invite people to work beside you at your desk. For example, I often have my students put their laptops on the right hand end of my desk so they can step through an Excel exercise on their own computer as I step through it on my computer.
- Element #4: Conference table legs
My desk was part of a very business-like Jesper office set I bought in Boise in 2002. I’ve been refining the desk ever since.
When, in January 2011, I was trying to fit the desk and its side skirt supports into my office a Concordia, I realized that there just were not enough degrees of freedom with side skirt legs. For example, you can’t really have a meeting with someone across a desk that has skirts like this. What I really wanted was a conference table. Once I realized this, I went to IKEA, and bought a Galant leg set and table frame (IKEA part number 101.501.69 I can’t find it on their web site) for $80 and make my modified Jesper desk into the conference table style desk.
The more I do GTD, the simpler I need my desk to be. It takes a lot of complexity to make a desk appear simple and purely functional. Note that I have 2 cable management systems under my desk. The white box attached to the left two legs is a $10 IKEA cable management solution that confines power strips and extra lengths of cable beautifully. I don’t care how messy the cables are as long as I can’t see and don’t think about them. In addition to the cable management system I have a Trip-Lite 12 outlet strip attached underneath the work surface.
Geek readers will detect an external USB hard drive on the top of the cable management unit. In 2011 I decided to squeeze another 2 years out of my 2008 iMac by replacing the boot disk with a solid state drive and moving the home folder to external USB drive. Amazing speedup!

The second cable management system is perpendicular to the white box, and consists of the dark felt trays with the light brackets holding them to the underside of the work surface. IKEA has apparently killed both these cable management systems, but fortunately, they have introduced new systems as well. So, for $40 you can have all the under-work surface cable management you need.
Cable management above the work surface is a matter of twist ties, cable ties, double-sided-sticky-tape, and corrugated finger-pinching tube. Here is the behind the scenes cable management story of my desk. Since this picture was taken, I’ve drilled a 3″ hole at the base of the monitor arm so I could route all the cables directly through the desk to the cable management trays beneath it. Here is the right hand side of the monitor arm: Note my pen and trusty 3″x5″ cards at the ready behind the iMac monitor.
Red arrows show tools behind the monitor, yellow arrows in the following two pictures show the extensive re/use of double sided sticky tape in desk enginerding.
On the left hand side of the monitor arm you can see two Bose speakers, a 7 port USB hub, a 5 port ethernet switch, and an $11 fluorescent light, all attached with double sided sticky tape. All this is a mess, but I don’t care, since I can’t see the mess. Out of sight means no open loop for my mind.

Note the white plastic objects in the yellow file folder fingers on the diagonal part of the monitor arm. These are 3D printed objects that I need to have readily available. They are clutter unless I need them, so I keep them behind my iMac screen. I don’t see them and so am not bothered by them while I’m working.
- Element #6: Killer Cool Paper Trays
The current state of GTD paper tray technology is deplorable! Even before I discovered GTD, I conducted a frustrated search of the internet to find something that was not boring, something I called “goofy.” What I found was a multiple tray system designed by Shaunn Fynn and sold by Custom Plastics Inc of Elk Grove Village, Il. I think that Custom Plastics has given up on selling this multiple paper tray. You can still find a very similar desk organization system at high end wood product components manufacturers like Doug Mockett but the series is being discontinued. No matter. I think the requirement is for some element of whimsy in your paper trays. By whimsy, I think that GTDers need to go beyond tidy. We need a dash of not-too-over-organized-and-fun, on our desks without introducing clutter. Shaun Fynn’s elevated multiple trays, are a perfect entry point a fresh breath of creative desk whimsy!
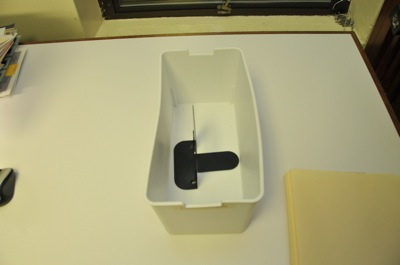
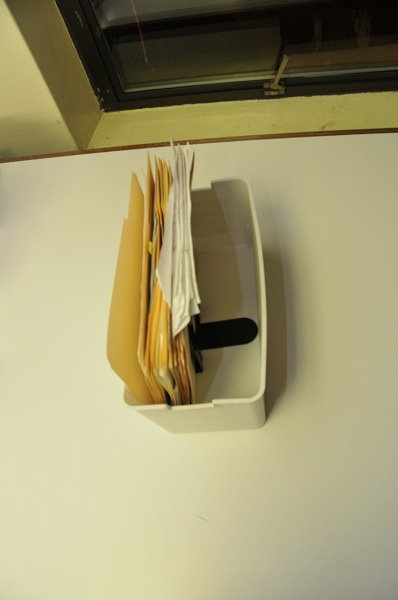
Story: When I moved to Concordia University last January, I took my original paper tray system that looked like the 3 tray system in the right of this picture:
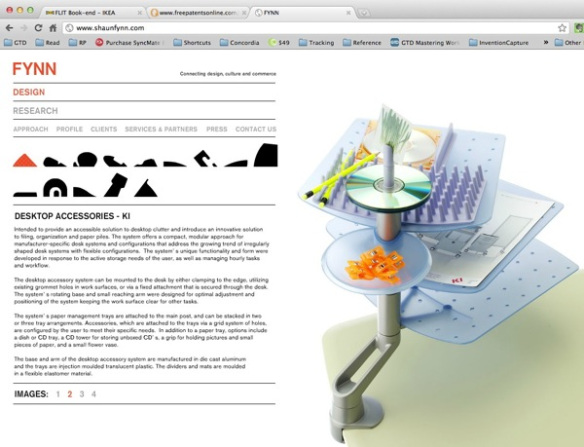
And then I blatantly sucked up to the awesome physical plant team at CU, and they removed the base of the tray system, and then J-B Welded the paper tray base to the base of my monitor arm. These paper trays are fun because they can rotate around the axis of the vertical post. You can line them up one above the other if you are felling left brained, or you can align them asymmetrically if that is what pleases your muse.
I use the top tray for my inbox (please note that since having a week to work undisturbed in my office I’m at INBOX ZERO!), the second tray has my natural project management form (I turned GTD chapter 3’s natural project management process, into a 1 page form. See Appendix A at the end of this post if you want a copy), and the bottom tray has blank white letter sized paper.
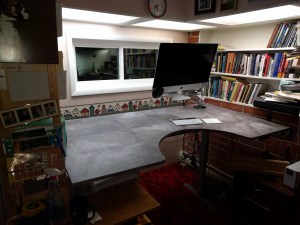
I started doing GTD in March 2009 (after meeting Ian Watson at COMDEX 2009 at the end of January). It took Ian a month to get me to promise to read GTD. The time since then has been a roller coaster journey of increased productivity, decreased stress, then increased stress, decreased productivity. In the process I’ve refined, refactored, rethought, and redesigned my desk. When I sit down now at my desk, I feel pleasure at being able to work. This is true at my office desk and at my home desk (BTW, stay tuned for a blog post on an upgrade to the home desk in January 2012).
I have learned, that if I am feeling pressure from work that there are two causes:
- First, I have not done my review. I don’t think weekly is enough for me to get current on everything. But daily is too often. I have an annoying meat brain and continue to search for the sweet spot of my meat spot. :-)
- Second, I am not organized enough.
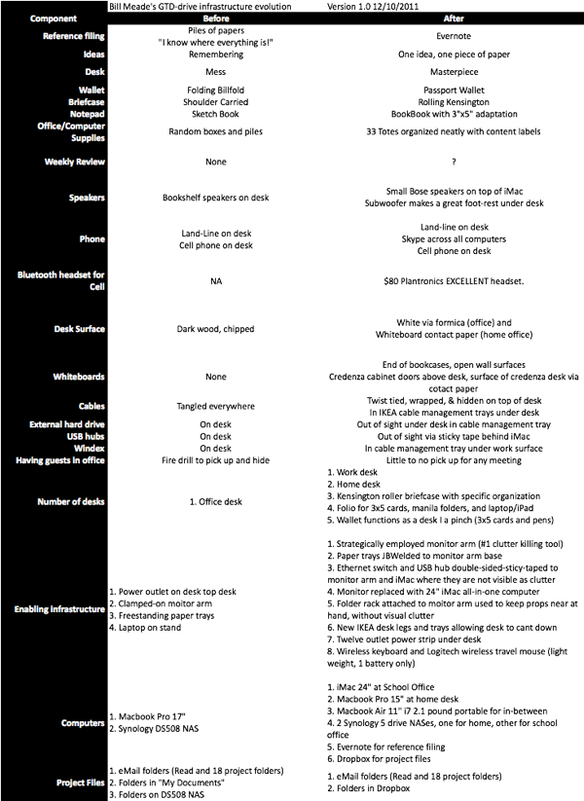
My desk is a key component of my trusted system. Desk is the place where I work on atoms and bits of my next actions. As I’ve sharpened my desk, my physical filing, electronic filing (Evernote for documents + Kindle for ebooks), I’m becoming more productive and less stressed. I see this working for my students as well. I think it can work for you if you have that knot of doubt in your stomach about whether you can ever hear someone say “Your desk is awesome!” (My wife Beth said this 2 days ago about my 2nd-string home office desk, and it made my week!). If I can implement GTD, anyone can (check out the before/after pics here if you haven’t seen them: http://restartgtd.com/2011/12/29/gtd-journey-after/).
For now, my theory of the perfect GTD desk is to bring together 6 elements (However, I reserve the right to add more elements if needed!):
- Clear desk surface
- Big (ideally 30 square feet)
- Slide to side (open front)
- Conference table legs
- Cable management
- Killer cool paper trays
In addition to my work desk, I have used GTD to redesign my wallet into a pico-desk, my BookBook laptop computer case as a nano-desk, and my Kensington rolling briefcase into a mobile desk. More on these in later posts.
- Appendix A: Meade’s Natural Project Management 1-Page Form

Support RestartGTD by buying at Amazon with this link!
45.624183-122.55558
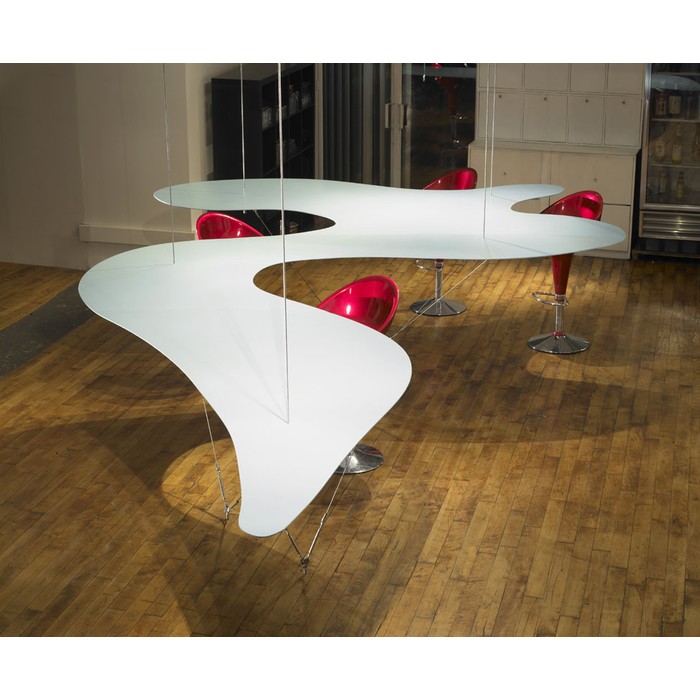
 Fixed Height Desk - (Modified) Galant Conference Table from IKEA


