Introduction:
I had a request after yesterday’s post on clutter, to show the basic 3”x5” card and manila folder system that I urge people to implement GETTING THINGS DONE (GTD hereafter) with. This post’s purpose is to answer any questions about 3”x5” and manila as I implement GTD.
Your mileage will vary on my advice. In fact, over time, my mileage with 3”x5” cards and manila folders has varied. The goal is to find a natural and expressively powerful way for your brain to work, not to rigidly adopt ideas. Right now I use a hybrid paper and computer (Evernote + Dropbox/Google Drive) GTD system. But, I reserve the right to go 100% electronic in OmniFocus in the future, or 100% paper. If it feels good, do that!
Cards and Folders:
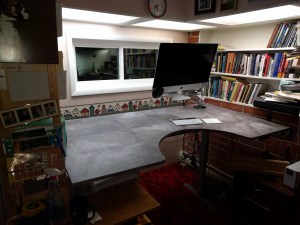
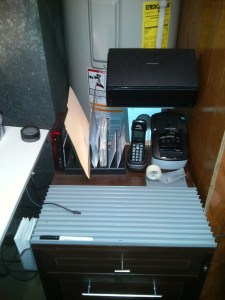
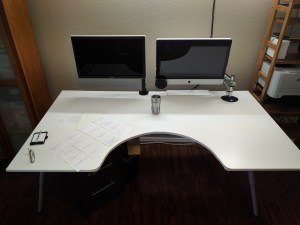
So, I helped an accountant implement GTD. Before GTD the accountant was very organized, in fact, almost over-organized. Take a look at the desk before and after the GTD makeover:
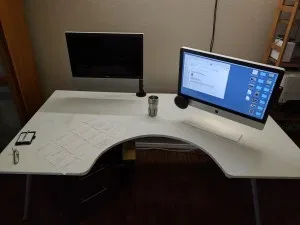
Accountant Before
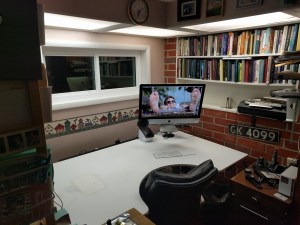
And then, we scanned all reference materials into Evernote, recycled the paper, and set up a simple manila folder project system with one folder for each project, and all materials (letter paper, post it notes, etc.) captured within folders.
Accountant After
Note the differences in the same cube. By switching note taking 100% to 3”x5” cards, ideas (one idea, one piece of paper) become mobile. Prior to 3”x5” cards, notes were taken in spiral bound notebooks and post it notes.
Spiral bound notebooks trap ideas in random order (see GTD page 30 where David Allen says “written notes need to be corralled and process instead of left lying embedded in stacks”) and post it notes seem like such a good idea when you are capturing the idea, but who knows where they go (with missing socks in the dryer?) when you need to refer back to them.
The basics of a GTD 1.0 makeover:
- All object cleared from workspace where they can be seen in main working position (usually looking at a monitor). The single worst thing you can have in front of you when you is a picture of a person. Your subconscious can’t stop itself from processing faces. If you must have pictures move them out of view of your main work position.
- Manila folder system kept outside field of view in main working position. In the after, the manila folders are at far left of the desk.
- All reference materials scanned and entered into Evernote. All project materials gathered into manila folders. Please stop second guessing yourself and order the ScanSnap iX500 so you can finally get this over with.
- *Note* Reference folders and project folders are PROFOUNDLY different. David Allen specifies supporting references be kept out of sight (GTD page 38) so having Evernote capture all of your materials is great. Besides, you don’t have to figure out how to move a filing cabinet into your office. And even better, you can take a filing cabinet out of your office!
And, … that is it.
How It Works:
You have an idea, you write the idea down on a 3”x5” card. One idea, one piece of paper, simple really!
Now, where do you put the 3”x5” card? If you don’t have a project that this idea is related to, you need to create a project. To do this I print a folder label on my Brother QL-700 label printer (link to Amazon for convenience but OfficeMax is cheaper). The print dialog looks like this:

Then I print the label (2.5 seconds) and attach to the manila folder. Giving me a nice neat folder to hold my project.
Next, you can put the 3”x5” card you created inside this folder. But now where do we put the folder? My answer is to buy itso small bins from Target …

And then insert a small metal book-end inside …
and then accumulate project “clumps” in the itso tote. Here is an itso tote with my current clump of writing projects.

You can see that the book-end prevents folders from becoming bowed.
The Payoff:
For me, the payoff from organizing projects in this way happens once I sit down to do the project. I take the folder, open it up, and then I can spread out all the ideas I’ve accumulated about the project. When I see that all my ideas are where they should be, I get a subconscious jolt of affirmation. Aaaahhhhhh all the ideas are here. Now, let’s go!
bill meade

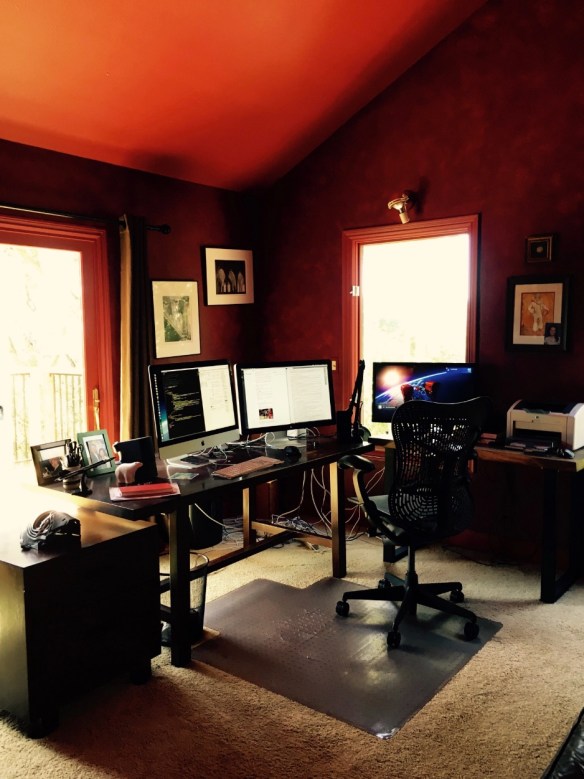
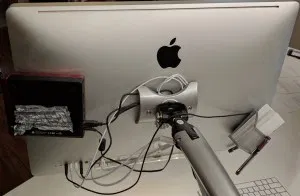
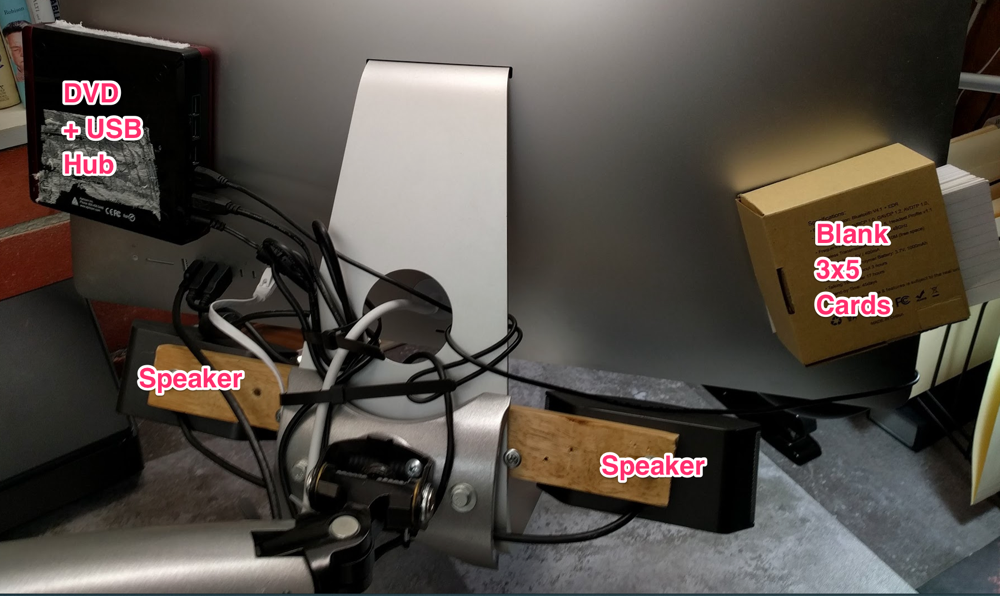
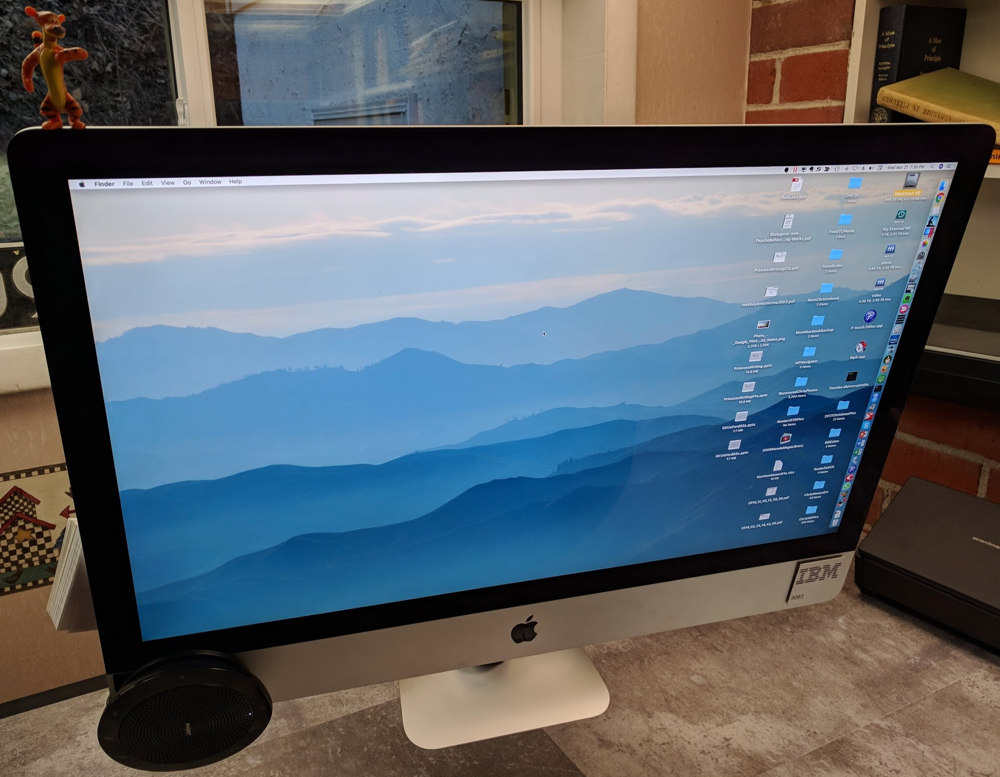
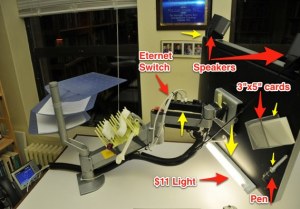 2008 24" iMac on VESA adapter (anyone want the VESA adapter?)
 Finally, on the right is a cardboard box that holds blank 3×5 cards to keep one piece of paper, available to capture ideas. The entire iMac back, remains a hideous melange of cables, cables, cables. But, I don’t care, I don’t have to look at them. Out of sight, out of mind … like water. :-)
 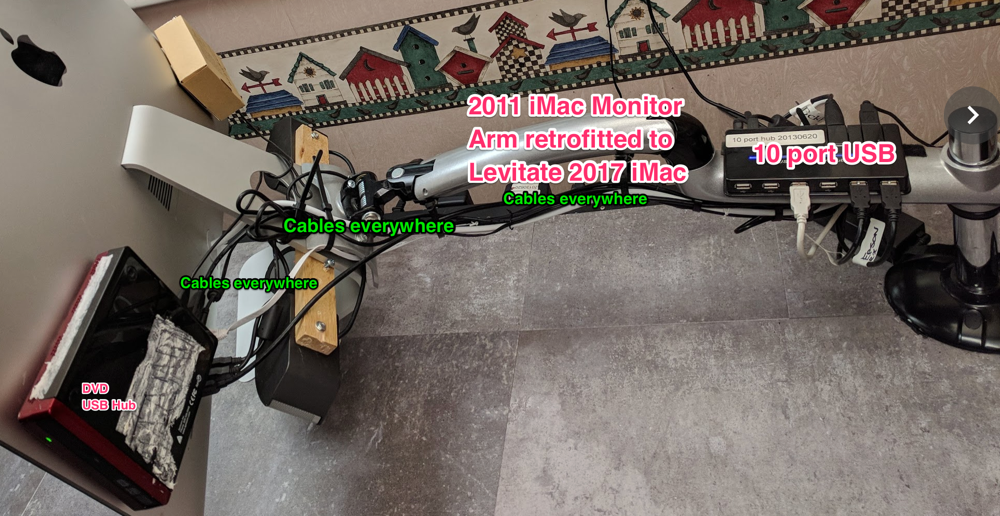 The best innovation of GTD Desk 5.0 is mounting of speakers up behind the iMac screen, angled down, to bounce sound off the desk almost invisibly. Step 1 bolt the speakers to board, step 2, tack the board to the iMac stand with two wide headed screws.
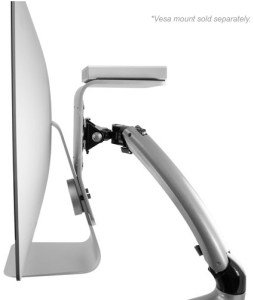
 Why not use the stand integrated into iMacs? Simple, because I need a desk, not a giant monitor stand. If you don’t have your monitors floating free, you don’t have a desk that can do rough organizing.


