Perfect GTD Desk V5.0 Upgrade! - Part 3 Back of the iMac

Introduction:

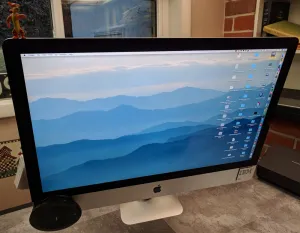
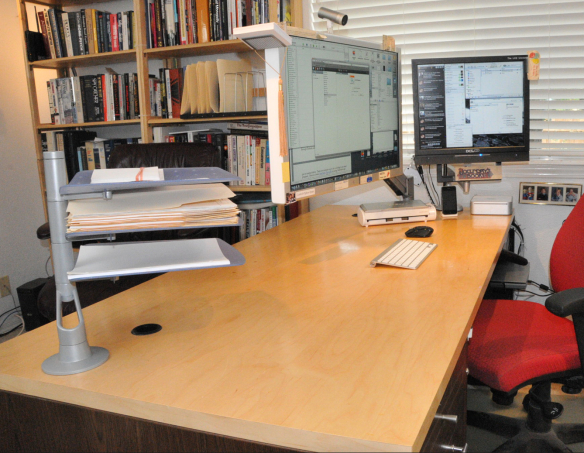
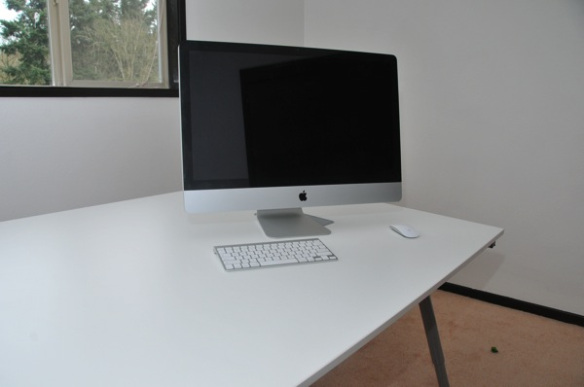
GTD Desk 5.0 with 2017 iMac

The first post on this blog, 2011/12/31 GTD Desk 2.0, had as its centerfold, a 2008 24″ iMac on a monitor arm with a hideous array of accessories mounted out of sight. Flashback:

2008 24" iMac on VESA adapter (anyone want the VESA adapter?)

The purpose of this post is to update post 001 (today’s post is 185) over seven years, and two iMac generations.The previous two posts on GTD Desk 5.0 covered desk resurfacing, and a sit/stand upgrade.

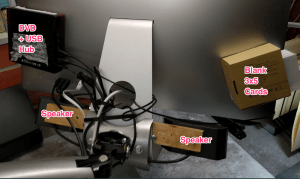
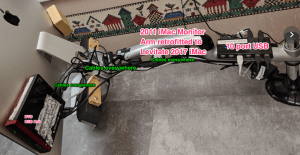
However, in addition to these upgrades, I have also graciously accepted Apple’s offer to take my money for a new iMac (first full iMac refresh in 6 years!) when I bought a 2017 iMac. The 5.0 update adds an external DVD drive on the left, with a 4 port USB hub, a board which allows speakers to be mounted to the iMac stand, and kept for the most part, out of sight.

Finally, on the right is a cardboard box that holds blank 3×5 cards to keep one piece of paper, available to capture ideas. The entire iMac back, remains a hideous melange of cables, cables, cables. But, I don’t care, I don’t have to look at them. Out of sight, out of mind … like water. :-) 
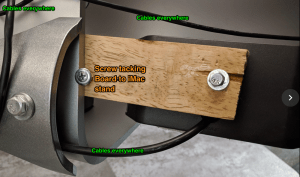
The best innovation of GTD Desk 5.0 is mounting of speakers up behind the iMac screen, angled down, to bounce sound off the desk almost invisibly. Step 1 bolt the speakers to board, step 2, tack the board to the iMac stand with two wide headed screws. 
Step 3 mount audio control on the base of the iMac, to make practical use of the impregnable iMac stand. Alas. But, mount a sound control on the base, and you can at least get SOME use out of it. 
Why not use the stand integrated into iMacs? Simple, because I need a desk, not a giant monitor stand. If you don’t have your monitors floating free, you don’t have a desk that can do rough organizing.

The final upgrade to GTD Desk 5.0 is the addition of the Jabra 510 speakerphone to the lower left hand corner of the iMac. With Google Voice and the Jabra, I have at long last recycled my office phone. More clear desk space!

bill meade

Perfect GTD Desk V5.0 Upgrade! - Part 2 Sit/Stand

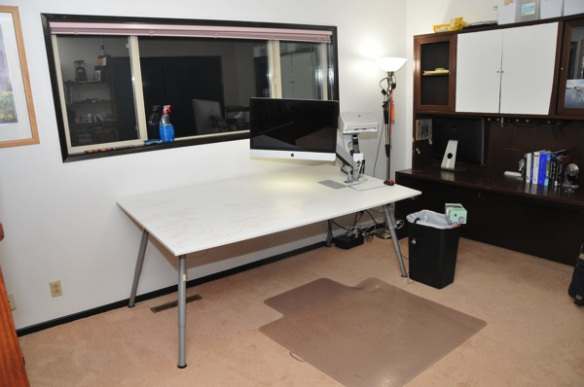
Before:

Fixed Height Desk - (Modified) Galant Conference Table from IKEA

After: 

https://www.standdesk.co/

After starting a new job in January 2017, I discovered the awesomeness of sit/stand desks. And since I was moving, and had the Perfect GTD Desk V4 in pieces, I decided to replace the fixed height legs with a sit/stand mechanism.

Most important = lift capacity of the mechanism, second most important = cost. Searching the internet while the moving van was crossing the country, I found StandDesk which has a 350 pound lifting capacity, and cost $429 delivered. I ordered my StandDesk from Amazon.com but alas, Amazon no longer sells StandDesk mechanisms.

Fear not, StandDesk sells the bases now for $399 without top. The telescoping mechanism is different, but no worries, the lift capacity increased from 350 to 400 pounds.

Why does lift capacity matter? Because I hang a 27″ 2017 iMac from an arm, iMacs weigh one pound per diagonal inch of screen size, so the iMac with USB hub, Bose speakers mounted hidden, along with the floor tile re-covering of the desk, Scanner on the desk, and heavy computer building projects, make me want max lift capacity.

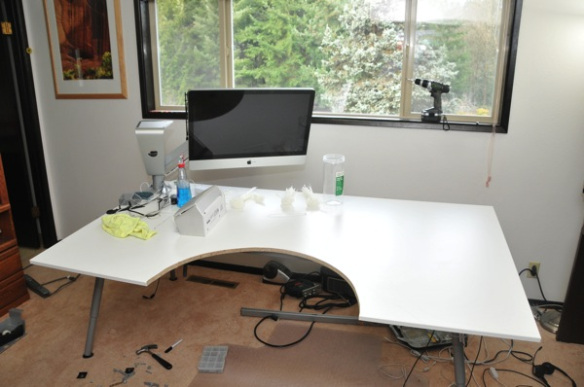
After After:

The work surface has a minimum height of 24.5″ and a maximum height of 50″ which is way more flexibility than my at-work sit/stand desk.

Next post will be “Perfect GTD Desk V5.0 Upgrade! - Part 3 Back of the iMac” where I reveal how I finally moved my speakers out of sight, without impairing sound. Two bolts, four screws, one piece of wood, and ZAP, sight-lines clear.

Bill Meade


Office Entelechy

  • Introduction

I’m mid-job-search right now. Decompressing from a 27 month stint at a startup with 60-100 hours a week. Received an awesome job offer last week that reminded me of a Rands In Repose post.

Scan down to “Deliberate Want” and the part about Michelle. My Michelle is Rachel, but I digress.

Decompression allows this thing, reading for fun, that it has been a while since I’ve engaged in. While in startup mode, I read for survival, not fun. But while I was finding Michelle in the post above, and sending the post to Rachel, I started reading more Rands posts.

  • Do this immediately!!!

And a post on CAVE ESSENTIALS jumped out and hit me so hard, I’m pointing you to it. I’m pointing you to CAVE ESSENTIALS right now! Do not walk, run to CAVE ESSENTIALS and experience organizational ambrosia via the written word.

Entelechy is a fancy way of saying “soul” Rand’s post is the soul of office organization. The elements of Rands office entelechy:

  1. Self-pleasing environment design (red walls that nobody else can understand)
  2. Telling people “The door… it’s right there.” at criticism of your office.
  3. Your “forever desk” …
    “A desk’s job is to build productivity, and for me, it achieves this by first providing an immense amount of clear working space.” There is an echo in this blog!
  4. Deep leather couch (so deep that when you put your back against the couch you are in a new time zone).
  5. “Lovingly curated bookshelves” (14)

Highly recommended!!!

Bill Meade

Getting Started with GETTING THINGS DONE - 2014 - in 28 steps

DSC_9660

Amendment:

Getting started with GTD is much easier if you have a buddy. Preferably, two buddies, and experienced GTDer buddy, and someone who is at the same experience level as you in implementing GTD. See GTD buddy system for more details.

How To:

If you asked me how to get started with GTD today (see What is GTD before embarking on this journey), this is the advice I would give. Step zero, take a picture of your desk. If you follow this guide, and get GTD to stick, starting point chaos, will be a valuable data point to refer back to. Here’s my initial desk before embarking on GTD

  1. Order GETTING THINGS DONE and 1,000 3×5 cards
    a. Buy the unabridged audible version of GTD and listen to it while you are driving.
    b. And, buy a Kindle or paper version so you can highlight passages, when you circle back to re-read GTD.
  2. Order a Fujitsu ScanSnap iX500
  3. Go to CostCo and get 4 large (free) boxes in which to triage documents
  4. Subscribe to Evernote
    a. Go to Evernote.com and click on “Sign Up”
    b. Get you your credit card and pay the $45 a year
    c. Get your email confirmation that you account is set up. Write down your username and password for evernote on a 3×5 card.
  5. Download Evernote and install the client on the computer you use most
    a. Download Evernote
    b. Install Evernote
    c. Connect the installed software on your computer, to your evernote account (use the username and password you wrote down in Step 4 c.
  6. Install Evernote Clearly into the web browser you use most
    a. Clearly is a browser add-in, separate from the software you installed above. Evernote = database. Browser add-in = on-ramp to database.
    b. Go to a favorite web page of yours, then click Clearly (a Luxo Lamp Icon) and watch as Clearly removes the clutter from the web page, allows you to highlight text. And most importantly, allows you to save the page to Evernote when you highlight or click sae. You are done for day 1. Time to walk your dog. Your dog will feel stress lifting off you as Millie demonstrates in the picture at the top of this post.
  7. Practice with Evernote (open it up, see the pages you have captured, add manual notes, create notebooks, etc.) each day as you wait for GETTING THINGS DONE and your ScanSnap to arrive.
  8. Practice with Clearly every day as you wait for GTD and your scanner. You might want to read the RestartGTD post where the capstone line is: “Clearly all by itself makes Evernote worth it!” towards the bottom. Then go back and play with Clearly and Evernote.
  9. When the ScanSnap arrives, unbox it immediately, and install it on your computer with the included DVD. This will take you about 20 minutes. Do not read GETTING THINGS DONE until instructed to do so in Step 12. If you procrastinate on installing the ScanSnap to save 20 minutes now, it will take you 20 months or never, to get the ScanSnap installed. Do it. Do it now! (31 seconds in)
  10. After the ScanSnap is installed, get it working so you can Scan-To-Evernote with one click.
    a. Start the installed ScanSnap software by clicking on its icon at the bottom of your screen
    b. Left-click once on the ScanSnap software icon after it is running
    c. Look for “Evernote” in the pop-up list, and left-click once on it
    d. Put a page in the ScanSnap, push the blue button, and watch as the page appears in Evernote. Cool!
  11. Once you have steps 1 through 10 accomplished, then …
  12. Read the first three chapters of GTD.
  13. Read only the first three chapters of GTD. Don’t give in to temporary energy and enthusiasm, and read the entire book. Just chapters 1-3.
  14. Energized by your first wave of hope after reading …
    Mark the 4 boxes you brought home from CostCo as
    “Recycle”
    “To Scan”
    “IN” and
    “Precious”
  15. Next put all your papers into the “IN” box. Don’t worry about making a mess. Just put each document in as a document. You will process and re-organize these documents later.
  16. After “IN” is full, then stop. Take the rest of the day off. I know you are eager to sprint to GTD nirvana. But, you need to pace expectations. Expecting to do a single good block of work at a time to implement GTD is a maximum. If you try to do more than a single block of work, you set yourself up for failure, self recrimination, and external ridicule. 83% of people who attempt to implement GTD fail. And they fail because they try to do too many things, too quickly, while tired. You did not make your organization a mess in a day. And you can’t transform it to a masterpiece in a day. One good thing a day is enough. If you want to see an organizational mess, check out the RestartGTD post on GTD Time Lapse at the top for before pictures.
  17. Next day, approach the “IN” CostCo box, and pull the first document from “IN” box, hold it up. Look at it, suppress any feelings about it, and ask yourself:”Will this ever have a next action?”
    a. If the answer is “Yes” put the document into “To Scan” and then go back to “IN” and repeat this step.
    b. If the answer is “Maybe” then put the document into “To Scan” and then go back to “IN” and repeat this step.
    c. If the answer is “No” then put the document in “Recycle” and then go back to “IN” and repeat this step.
  18. Once your “IN” box is empty, or your “To Scan” box is full (whichever comes first) then take another rest. At least 90 minutes to let your brain reset.
  19. When you come back, move the “To Scan” box next to your ScanSnap. Take each document out one at a time. Put the document into the ScanSnap, push the blue button. When the document is finished scanning, either put it in the box labeled “Recycle” or the box labeled “Precious” if the document needs to be saved.
    1. Once your “To Scan” box is empty, take the rest of the day off. Manage your expectations. One block of GTD work. One day. P-a-c-e yourself.
  20. Go back to Step 15 if you have more papers to process. And repeat Steps 15-20 until all the paper in your life has been recycled or captured in the box marked “Precious”
  21. Take the rest of the day off. Manage your expectations. One block of GTD work. One day.
  22. Once you have all the paper in your life captured in Evernote, the next step is to get your desk clear. Everything off. No pictures. No teddy bears. No momentos. Nothing on your desk in your field of view as you work. In particular, no pictures of faces in front of you where you work. Your brain will work processing faces without ever shutting off. One student has commented to me that this HUGELY reduced her fatigue.
    a. If you don’t have a real desk. Get a real desk. No substitutions, kitchen tables do not count. Floors do not count. You need a big space where you feel pleasure when you work. Go to IKEA’s “As Is” department and buy returned legs, tabletops, panels, conference tables. And modify to taste.
    b. Go to Amazon and get a monitor arm, wireless keyboard, and wireless trackpad or wireless mouse, to transform your desk back from being a giant monitor stand cluttered with paper, into being a brain’s desk that facilitates work. This is the most disregarded step in my instructions. But, it REALLY HELPS. So give yourself a leg up and try investing in your desk.
  23. Once you have a clear desk, and all your paper captured in Evernote, it is time to take your first “After GTD” desk picture. Put the “Before GTD” desk picture into Powerpoint on the left. And the “After GTD” desk picture on the right. Then save the PowerPoint slide where you won’t lose it. Here is my before/after PowerPoint slide:BeforeAfterDesk_pptxBefore/after pictures are important. Before/after pictures are hope. Elephant food if you are a Heath & Heath SWITCH: How to change when change is hard fan.
  24. Next step is time to clear your mind. Most people have 300+ projects in their minds when they start GTD. Sitting down to scrape these out of your head and on to paper, is terrifying. But once you start, you won’t believe how it lightens your mind, and how the time flies.
    a. Sit down and write down every open loop you can think of on 3×5 cards. Go for 100 at your first sitting.
    b. Once you get to 100, take the rest of the day off. Manage your expectations. One block of GTD work. One day.
  25. Repeat step 23 until you don’t have anything else on your mind.
  26. Once your mind is clear, then lay the cards out on your desk. The bigger the desk, the easier this is. Then
    a. group the cards together in clumps of similar stuff.
    b. These clumps are your projects.
    c. Organize each project’s clump into a neat stack on your desk. Once you have all the cards into their natural clumps
    d. put rubber bands around each stack of cards/clump.
    e. Take the rest of the day off. One block of GTD work. One day.
  27. At this point, your mind is clear. You have all your ideas where your brain knows they won’t be lost. Now you have to decide how you want to move forward with GTD.
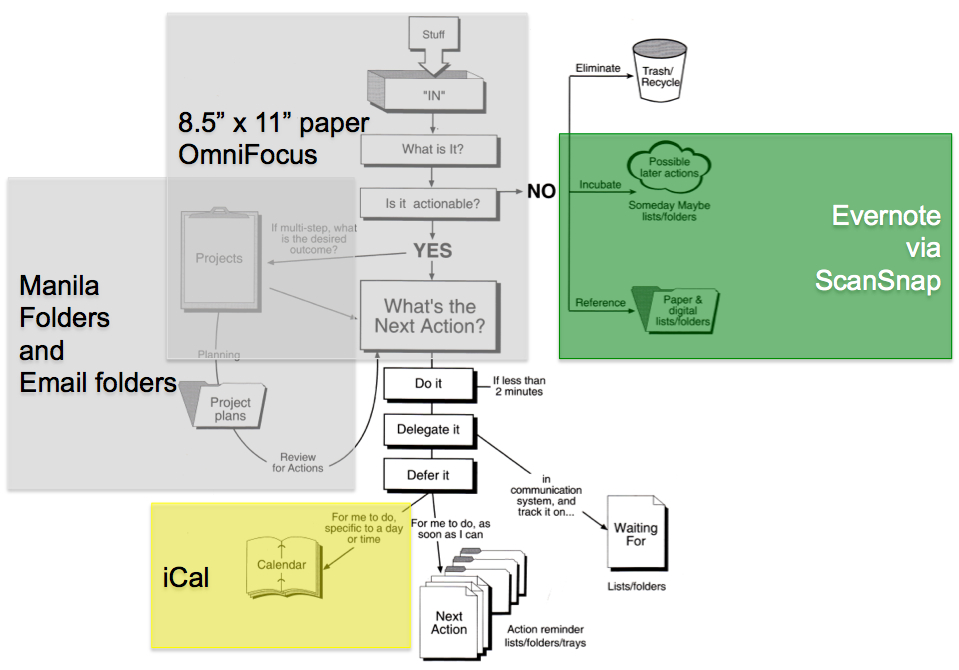
    a. Whether you will go all analog, using manila folders - one for each project - with 3×5 cards in them, and keeping a master project list by hand.
    TrustedSystemgenerations01_pptx 2
    Or …
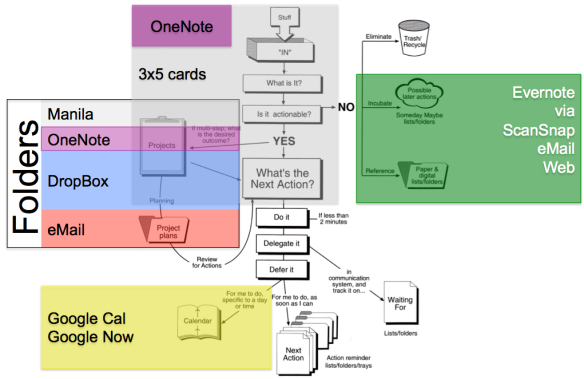
    b. Go digital OneNote to organize your projects. Creating project lists with [[projectname]] and then transcribing your 3×5 card notes for each project, into next actions. *Note* your 3×5 cards are likely not Next Actions in the David Allen sense. The step of taking a thought on your mind that you are feeling guilty about, and then compiling it into next actions as you transcribe the card into OneNote is not wasted effort.
    c. Using Evernote to manage your projects as well as your reference files. Create a “Projects” folder in Evernote. Then, create a sub folder for each project. And then either transcribe your 3×5 card into next actions as in b. above with OneNote. Or, by scanning your 3×5 cards into Evernote.
    d. Using OmniFocus (if you are a Mac person). OmniFocus is powerful … and dangerous. OmniFocus is probably the highest fidelity GTD software system. But you may experience over-organization from OmniFocus with the consequence your brain refuses to use the system … as I did. However, if you are a sales person, think hard (try) OmniFocus because David Allen has refined the GTD system to work for sales people. Nobody works harder than sales people, you will need all the system you can get to do your job well.

    e. Some kind of hybrid system. My GTD trusted system is broken up across paper and electronic tools. This is less simple to explain. But, my brain will use it. I tried OmniFocus in a monolithic trusted system (27 d.), but I hated sitting down to my desk. So I had to retreat to paper.
    TrustedSystemgenerations01_pptx

The Goal

The above 28 steps are the process that I’ve seen work the best for the about 200 people I’ve helped boot-up GTD. Personally, I’ve stayed on the GTD wagon because I have a ScanSnap and Evernote. These tools make it easier to capture information correctly, than to live in a mass of disorganized papers. My love of 3×5 cards and manila folders gradually gives way to electronic project organizing as a project lifts off. The cards and folders are early stage capture tools for my projects.

Your mileage will vary. My tools will not be perfect for you. I’ve changed my tools so many times (except Evernote and the ScanSnap) that I’m proof that one size does not fit all.  Single design does not even fit one person all the time. But the point is to build your system gradually, experimenting, testing, reflecting on how it *feels* to your brain. Does it allow you to swing, to stop constantly worrying you’ll forget something? Does it *feel* fun to work with? Does your system cut your procrastination and guilt? Are you trying to do too much, too fast?

Incompleteness

This process will not get you 100% to the way David Allen’s system. But, it will get you to the nearest local maxima of GTD productivity and GTD swing. Once you go paperless you will discover what a drag paper is. Your Evernote reference filing system will allow you to find everything … in 15 seconds. Evernote *secret* = Evernote does text recognition on all your documents. All you have to do is think of two words that would only be on the document you need, type them into Evernote and *zap* the document is at your finger tips.

Once you have all your projects in some kind of place (manila folder, OneNote folder, Evernote folder) you will feel release of stress. An emergency department doctor who I dragged kicking and screaming to Evernote and a clear desk said to me “I can’t believe how much less stress I’m feeling now.” After my first week of GTD my wife said “Why are you so happy?”

Notes

  • When doing a mind sweep, I do not follow David Allen’s two-minute rule. This is the only time in my GTD life, that I don’t DO anything that can be done in 2 minutes, and instead, just write down the 2 minute tasks. After my mind is empty, it is easy to take the 2 minute pile, and burn through it. And, it gives you quick wins to keep expectations at bay.
  • I’ve found that three steps in the above process are sticking points:
    a. Getting the scanner out of the box and functioning. I’ve had to drive to people’s desks and make the scanner go for them because of this “out of box” sticking point. See RestartGTD post abomination of deskolation for case study.
    b. Getting the desk clear. Again, I’ve found it easier to drive to desks and show people what their desk looks like REALLY EMPTY. If you contact me ([email protected]) for advice. The first thing I will say is “Tell me about your desk?” and what you need to say back is “I got EVERYTHING off it.”
    c. P-a-c-i-n-g yourself. Manage your own expectations. Do not change everything in your organizing, all at once. Know that change will take t-i-m-e. Match building your GTD system, to when you have blocks of fresh energy. Energy is temporary. Read that sentence again!
  • This step-by-step puts getting your computer infrastructure working as a pre-cursor to reading GTD. If you don’t put infrastructure first, you will try to get Evernote and your ScanSnap working while you are tired. Not a good strategy.  
  • When starting out, keep two separate kinds of files: (a) Project Files, and (b) Reference Files. Consciously separating the two kinds of files can prevents confusion. *Aside* I suspect that I *resist* using Evernote for project files because my brain likes having physically separate project and reference files.
  • Reference filing is a capstone skill of getting into and staying with GTD.
  • Having a real desk is a capstone skill of getting into and staying with GTD. Clutter is the enemy, and there is more clutter on desks than everywhere else in your life. Win the battle against clutter, GTD will work.
  • Managing expectations is a capstone skill of GTD. One block of GTD work. One day. Is the rule.
  • Experimenting with new tools, selectively, is a capstone skill of staying with GTD.

One idea, one piece of paper … One idea, one card … Seriously? Bill’s cards often have >1 idea …

2014-08-17_12_50_55_jpg

Example De Jure Misuse of One Idea One Piece of Paper

This post began as a response to a reader email. In the beginning was R. asking about cards. I’ve expanded the post with pictures and some of my GTD history, in the hope that this post can be a stepping stone for other people on the GTD journey.

R.

Sorry it has taken me so long to get back to you. But, I’ve been looking forward to writing this email ever since I skimmed your message 2 days ago.
On Wed, Aug 13, 2014 at 8:49 AM, R. wrote
R.
I am finding one thing extremely difficult to get my mind around.
The one idea, one 3×5 card.
​I got 1 idea 1 card from David Allen’s “one idea, one piece of paper” which I can’t actually find in GTD, but I came away from GTD thinking it. Whether he said it or not. Or, intended me to take away the 1-idea-1-card concept, the value is 100% in idea modularity.
What I mean by idea modularity, can be seen by comparing separate 3×5 cards with what most people do, which is to carry around a “log book.” I used to carry a log book and paste business cards into them and write notes, mind maps, action items, etc. in them. But there is a problem: log books turn into higgledy piggledy quagmires of open loops.
I would write stuff down, and then never come back to the idea. Which, my subconscious saw, and consequently, my subconscious kept the job of “not forgetting” so I wasted just as much energy remembering, as I would have without the log book.
David allen talks about taking these kinds of log books and blesses using them AS LONG AS YOU GO BACK AND RAKE OUT ALL THE OPEN LOOPS and capture them in a modular way. By modular, I *think* David Allen means taking the idea and getting it into a project folder that the idea relates to. Here is what he says:

David Allen:

“I usually recommend that clients download their voice-mails onto paper notes and put those into their in-baskets, along with their whole organizer notebooks, which usually need significant reassessment.”

Allen, David (2002-12-31). Getting Things Done: The Art of Stress-Free Productivity (p. 118). Penguin Group. Kindle Edition. 

By “reassessment” I *suspect* David Allen means the ideas usually are laying in log books in all their chocolaty project goodness, waiting to be articulated as projects, and then converted into next actions. At least when I was keeping log books, I rarely wrote down projects, let alone next actions. In fact, what I usually did was to write down “AI” for Action Item and the wrote down a project (not a next action). And to my brain, projects laying around in their chocolaty project goodness in a log book, were anything but actionable.
So, back to cards …
3×5 cards are modular because they capture the idea in next action form, stack neatly, and they go cleanly into manila project folders. And as I’ve said many times on RestartGTD, when I open up a project folder with note cards in it, and I see all my ideas in one place, ready to go, I have an “ahhhhhhh” feeling of relief at not having forgotten the ideas, and a flash of excitement as I can dive into the project (spread the cards out on my huge dungeon desk) and get going.
Bill Dungeon Desk
For me, being habituated to a trusted system process of getting ideas on cards and cards into folders, enables me to make up project folders for ideas, usually in advance of the folder turning into a real project.
Yeah, this opens a whole new can of worms. How can I make a project for something that isn’t yet a project? I will tell you. I. Do not. Know. But, somehow, my subconscious seems to have gotten a handle on preemptive project definition … via working with a trusted system. Cool!
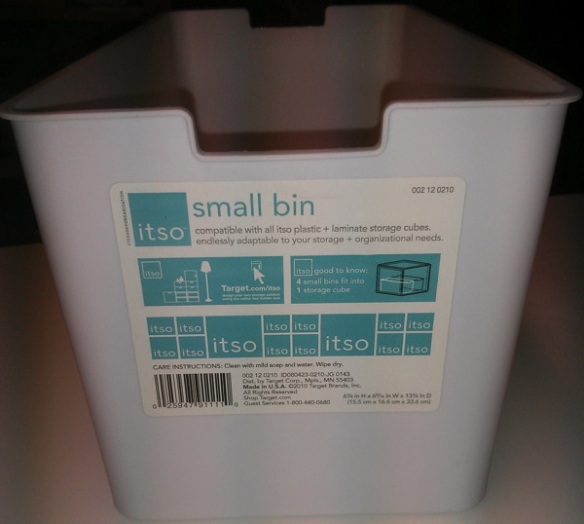
I start having ideas a month or two or three ahead of projects. So, I just create a folder, and file it in a Target Tote.
Target Tote Action Shot
IMG_20131230_213627.jpg
Target Tote Label
And then once I’ve added 8 to 15 cards to a folder, that folder reaches some kind of critical mass, and the project folder turns into a real project. At that point, I have a realization that those thoughts in THAT folder I started, are now “real” and have to be acted on. *Bing* subconscious has now upward delegated a project to my conscious.
R.
After reviewing your from 12-30-13, 3×5 Cards and Manila Folder GTD Startup, I felt that I understood the mechanics of the process you use, but I found myself straining to read how you breakdown 1 idea per card. I saw several lines on every 3×5 card and was unable to translate that to an example of  appropriate granularity for ideas.
​There is tension in my mind when I write stuff on cards. ​
ASIDE: Story of Bill starting GTD:
When booting up GTD, I initially used letter paper to capture open loops and thoughts. Just like David allen says.
iPhoto
Generation 1 GTD Desk
This was before I discovered “thematic clumping” folders together in totes from Target. Consequently, all folders were created equal, and I bought large folder organizers, took books off shelves, and had massive quantities of folders (look to the left of the top of the big display and you can see folders in an organizer.
This was a bit much. I only accessed a minority of the folders, and all the folders had letter size paper in them. And the volume of paper began to work on my head. Here is a picture of my tote library of thematic clumps. Turns out there are a lot of ideas in one’s head that when they can be safely captured, flee in delight from staying in the cranium not being forgotten. Who knew?
Thematic Clumps of Captured Ideas
(and some non-recyclable papers)
But, now I’m way ahead of myself. As GTD began to produce paper, it was a bit much. I was not expecting a lot of refugee ideas from my head, to insist on be resettled in paper, in thematic clumps of Target Totes. So, I took a temporary detour from using paper, and being 100% David Allen, to using OmniFocus.
In fact, I got so carried away with electronic organization I entered 100% of my paper into OmniFocus. Electronic heaven of GTD organizing. The only problem was that I could not stand to sit down to my computer.
Because … all my work was there waiting for me.  My desk became a trap. In fact, let’s take another look at my desk:
iPhoto
Does anything stand out about this arrangement? Like the iMax screens (don’t forget, event he iPhone was waiting expectantly)?  Note I have subsequently gone to a single monitor, and zero materials (not counting cats) on my desk.
Another David Allen saying that I remember from GTD (but which I cannot find in the Kindle version) is that if you get TOO ORGANIZED, your brain will refuse to use your trusted system. OmniFocus put me face to face with over-organization. A first for me.
Omnifocus, is great. Omnifocus is powerful. But because OmniFocus has built in outliner I was seduced/intoxicated to the dark side of one idea, one piece of paper. I had entire projects outlined with next actions. Project = heading, next actions = list underneath. In fact, reflecting, this is better but from my brain’s perspective, not different, from the land of higgledy piggledy quagmire log books. And my brain did not like it. So my brain went on a GTD strike, for the old work rules.
So, to wrap up this aside, I had to go back to paper. My brain “gets” paper.  But with letter paper, there is so much wasted space. Seems like a lot more wasted space that 3×5 cards. Because I recycle every piece of paper, I thought “3×5 cards must even be less paper to be recycle!” (*Note* which I don’t want any recycling experts reading this, to disabuse me of. :-)
So, I went back to paper, manila folders, but this time, using 3×5 cards exclusively.  Sorry the aside got so long, but this sub-story of my GTD journey, is a common GTD occurrence. GTD is a long string of sub-stories.
Articulating sub-stories is a big reason that I started the RestartGTD blog. In fact, this re-telling of the paper to OmniFocus to 3×5 card cycle, made me realize that the thematic clumps of ideas in Target totes, happened, because my brain finally had a repository for thousands of ideas it was not forgetting. Once it could trust me to not lose the ideas, it went (subconsciously) full bore to dumping the ideas to long term storage in my trusted system.  *Note* to self, people implementing GTD for the first time, might want to plan for a lot of resettling of ideas on to paper or whatever their brain likes as a storage media.
ENDASIDE: Story of Bill starting GTD
When I’m writing ideas on 3×5 cards, I don’t discipline myself to a single idea per card. You caught me!
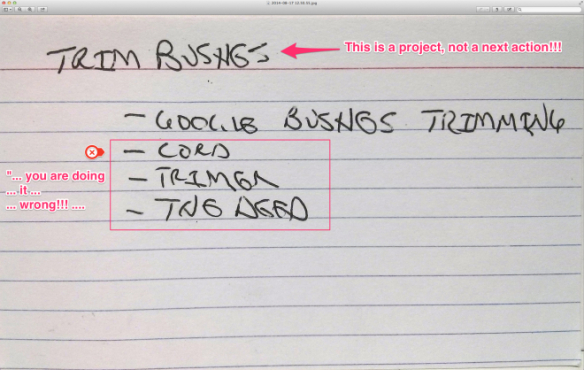
Only one idea per card, feels like wasting paper, just as using letter sheets felt like too much waste. So, if the ideas are related to the same project, because I’m a cheapskate|undisciplined, I’ll write multiple ideas per card. Or, like the card at the top of this page, I will sometimes title with a project, and then bullet with next actions to complete the project.
However, you will be heartened to know that while I’m writing the 2nd and 3rd ideas on the card I’m thinking “You’re doing it wrong. One idea, one piece of paper!” I just don’t listen to myself, because I want fewer cards to do the work.  And in many cases, a card is enough for a honey-do project like trimming bushes.
R.
I believe I am way ahead of where I would be if I only had the GTD book in attempting to implement GTD.
​REMEMBER: GTD is not about “doing it right.” GTD is about hacking your own brain by building a system around it, that your subconscious can use to make you look like a genius. Life in GTD is experimentation, discovery, planning, de-planning, refactoring your system, and trying again. Originally I intended RestartGTD to become a sharing platform for people who bump up against hard issues with GTD, sharing their success with others.
GTD as David Allen does it, is a highly weaponized system for sales people. But, most of us are not sales people. So we have to listen to our feeling, intuitions, and and make efforts to test, evaluate, and reflect on what is pleasurable, as well as what works.
Hope this helps!
bill meade ​

What is GTD Warm Boot Step #1?

Where Does a New Work Flow Start?

billathp.jpg

The Author @ HP Boise Legal Circa 2001

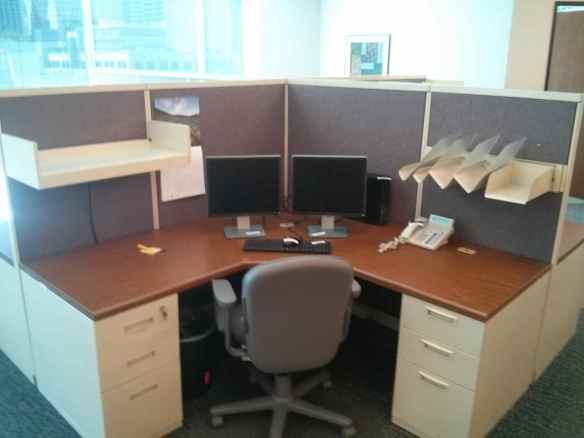
The last time I had a cube in corporate America, the cube came with 4 walls. Apparently, a few things have changed since “back in the day.” Today a cube is truncated into a
c | u | b | e so that four people put together have four walls. So I’ve got a corner or 1/4 of a cube.

Ironic Math Question: Is a corner of a square, a square root?

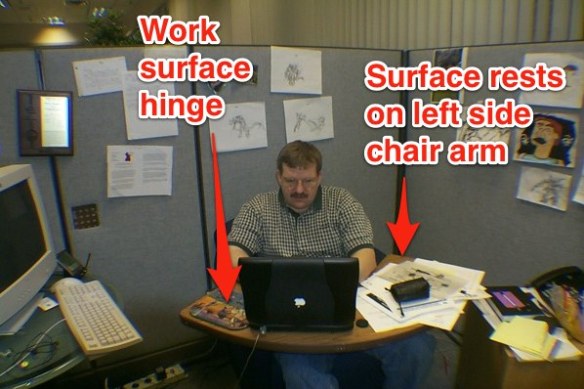
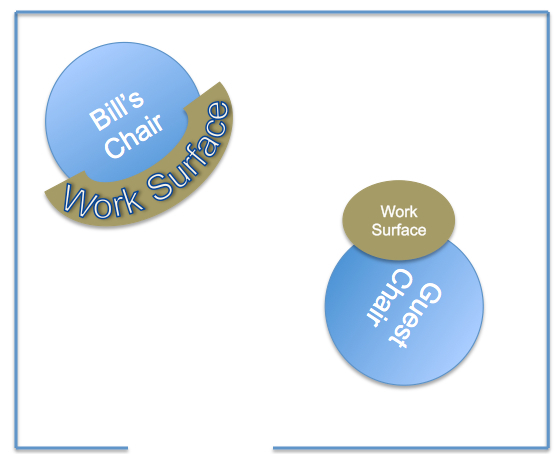
Back story, at HP I asked that my cube have zero work surfaces. Instead I ordered two lobby chairs that had tablet arms for laptops. And on the chair I used, installed a long work surface that reached from the right table arm to the left. Top down my cube looked like this.

Presentation1

The fun thing about this set up was people would come in, sit down and say “Why is your cube larger than everyone else’s.” This was fun, because my cube was not larger than everyone else’s. Same as.

And same as brings us back to desk 1.0 at new job in the insuranceville company town.

IMG_20140717_131307

It is only natural to feel a moment of remorse for moving from my dungeon desk (see below) to a corporate environment with a uniformity fetish. However, life is bricolage (RestartGTD link) and constraints set you free (see previous post).

One big constraint of the new work space is books. Perhaps you have seen my picture in my library around the internet …

Spitzweig 1850

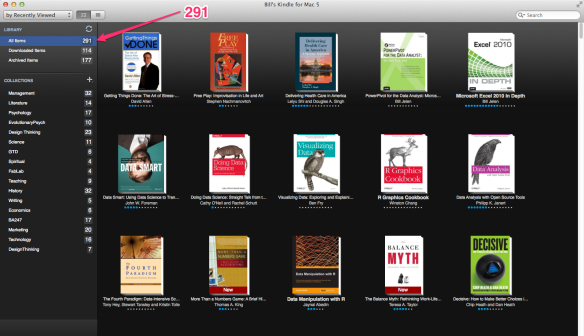
Alas, no more shelves, ladders, or extraneous reference materials. The internet is some compensation, but Mostly I’m shifting my references into Kindle and where possible, PDF files.

Bill_s_Kindle_for_Mac_5

GTD Start Up

I decided to start with a 3×5 card heavy GTD setup. One idea, one piece of paper. Then, a manila folder for each project. In slinking around the supplies room if found a lot (20) diagonal folder holders that were “locally available” to install without causing any drama. So, here is what my desk looks like when I arrive in the morning.

When I first arrive in the morning I move my monitors out of the way, up to the shelf, and then do a relaxed mind sweep. At least for now, I’m arriving at 8:00 am which is a scosh before my group, so I can take 10 minutes or so to allow ideas to bubble up, write them on cards, and then organize the cards into groups (columns).

My new boss (who no, has not read GTD … yet …) is great at emailing me projects, hints, tips, etc. So my first week, I started by taking her emails, cards where next actions were captured during conversations, and then hacking out an initial set of projects. Each project gets a folder, and a diagonal slot at upper right on my desk. Cards get filed in project folders.

This physical folder organization has felt to me like it has helped trust to develop fast. If I’m not at my desk, the information is available for my boss to walk up to the folders, find the project she is concerned with, open the folder and see:

  • At the very front a list of next actions for the project. Think of an excel spreadsheet list that has completed tasks and next tasks.
  • The individual 3×5 cards with next actions on them.
  • Supporting materials for the project (most of which she has lent me, so this is great for her to be able to “pull back” materials she needs)

I also have a “Projects” folder with a list of all the individual projects. This list has been handy as my boss is on the spot with her boss and her peers about what I’m going to be doing (this company has a strong norm of close monitoring of new employees).

That is the initial set up so far.

bill meade

Get “IT” Off Your Desk!!!


Source: Ebay

Introduction:

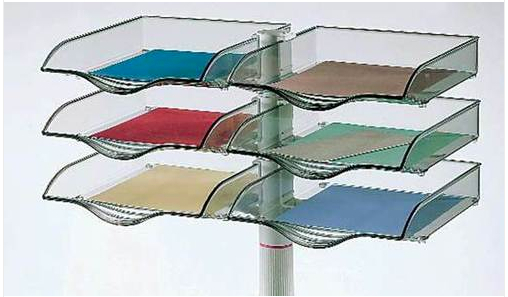
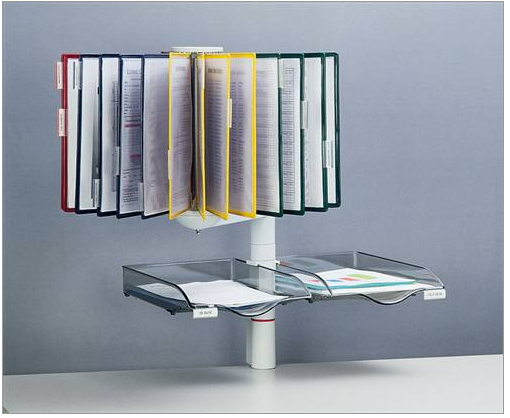
I’m always on the lookout for paper trays that get paper off my desk, so the entire surface is free to organize 3×5 cards on.  Ken in a comment pointed to a very interesting family of off-the-desk products.  Purpose of this post is to show the product family off and point out the relative cost-effectiveness of these desk accessories compared to say … Steelcase desk accessories.  

The accessories:

In addition to the three tray unit for $40 above, there is a two tray unit for $30 … 

And a two tray + phone organizer for $40 … 

NewImage

A formidable six tray unit for $40 (the unit that Ken alerted me to) … 

Screenshot 6 26 13 9 20 AM

Note that the paper trays are rotated 90 degrees from their orientation in the three tray organizer, so it looks like the trays can be mounted to the tower, from either side, or the tray’s back.  

A rotary catalog + paper tray organizer for $40 … 

Screenshot 6 26 13 9 22 AM

And to mix it up a little, a catalog + phone organizer for $80 …  

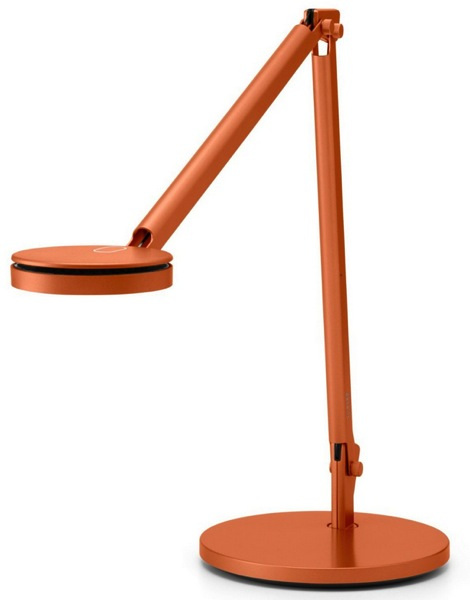
For comparison, here is a Steelcase task light for … $340!   

Screenshot 6 26 13 9 29 AM

So what? 

These desk accessories are significant because, like monitor arms, they allow you to clear the surface of your desk.   Here is my desk before monitor arm: 

D3M 3218

Here is my desk after monitor arm:  

D3M 5534

Having the monitor off the desk surface allows a dramatic increase of usable desk space.  Having a monitor arm allowed me to write on my desk or sort 3×5 cards (my atomic unit of thinking) without restraint.  

My desk surface is an IKEA conference table, so it provides a lot of space.  I used this table for a year and then on impulse leaned over the desk and stretched my arms to see how much of the surface area I could reach: roughly 40%.  I composted this for a few months and then with the help of my cats … 

I cut out a plug for the mandatory hole in IKEA conference tables, and then diagrammed a semi-circle of 15″ at the middle of the desk:  

and then cut it out:

D3M 5580

Then bought white edging material at Home Depot that I ironed on to the raw edge of the cut. 

 With the cut-out I can now reach 80% or so of the remaining desk.  Of course I have lost some usable desk space from the cut out, but I have gained much more use of the remaining desk space.  For example, without the cutout, I needed to push my keyboard 14″ or so from the edge of the desk in order to get my forearms on the table (my perfect ergonomic position for typing).  As I type this my keyboard is about 5″ from the top of the cut out, and my forearms are just wresting over the edge of the cutout.  Comfy! 

So what? 

The signal in the noise of this post is that if you work at it, you can get your desk clear, you can improve the usability of your desk, you can be more organized and more comfortable at the same time.  The more of your desk you can use, the more focused your work can be.  

bill meade  


Perfect GTD Desk +2: Desktopia Redux

D3M 5585

See also: The Perfect GTD Desk +1

See also The Abomination of Deskolation Redeemed 

See also: The Perfect GTD Desk

Introduction:

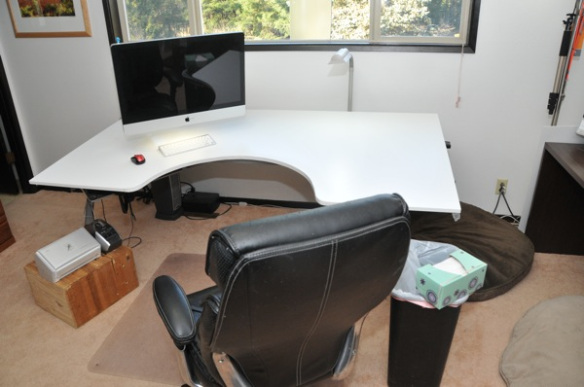
Perfect GTD desk +1 has been refactored once again.  The above action shot displays several changes:

  • The monitor arm has switched ends of the desk
  • The cable access door in the Ikea Galant Conference Table has been filled in with wood
  • Gave up on mounting the Fujitsu ScanSnap on the monitor arm.  It was cool to look at, but even cool stuff is clutter when you are trying to get work done.  So I resurrected a shipping box and mounted both the ScanSnap and the Brother label printer on the box.  So far so good, the box has not interacted with the chair legs.
  • Screwed the chair mat to the floor in the correct location with 4 2″ drywall screws.  *Bam* no more wandering chair mat!!!
  • A 15.5″ semi-circle has been cut out of the center front of the conference table.
  • To create a 15.5″ radius, the conference table was slid forward until the back edge of the desk was flush with the Galant support frame.
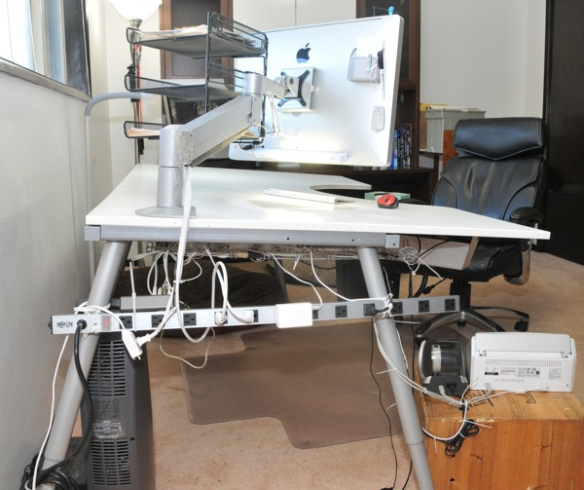
  • I also slid the conference table surface to the right until the left edge of the work surface became flush with the left side of the Galant support frame.  Here’s an action shot of the top left corner of the desk:
  • D3M 5586
  • Power adapter moved from underneath the work surface to Galant table legs.  With diagonally crossing cable ties it was simple to mount the power adapter and then slide it around to readjust it.
  • A cordless remote control light switch was added (mid right hand of the back of the iMac) controlling the keyboard light, the floor lamp over the desk, and the floor lamp in the corner of the office.
  • The “un-drawer” was shifted left and canted at a diagonal angle from lower left hand corner of the desk, to upper right hand corner.  This removes the un-drawer from constant collisions with knees.
  • The purpose of the undrawer is to hold all the items that need to be at hand, but that clutter up the desk surface.  I have stapler, tape dispenser, utility knife, a 10 port USB hub, flash light, and my Plantronic USB headset (wireless headsets suck!).
  • Action shots:

  • USB and power were added to the right hand end of the desk (form the semi-circle side of the desk).  While I wanted usb and power plugs available, I need them to be out of sight, and they can’t be mounted under the surface without cables working their way out with gravity.  So I turned both poet and USB adapters 90 degrees and mounted them with cable ties and cable tie anchors.
  • Action shot:


 Results:

When I sit at my desk now, I’m in the semi-circle and can rest both elbows on the work surface at all times.  I can also reach a much larger proportion of the work surface.  I especially noticed the altered surface to volume ratio of the desk when I wiped it down with Windex to shoot the pictures in this blog post.  Standing in the semi-circle it is easy to wipe down the entire surface of the table.

When people try the desk out, the first word that comes out of their mouths is “Game changer!” and then “I’m going to do this to my desk!”

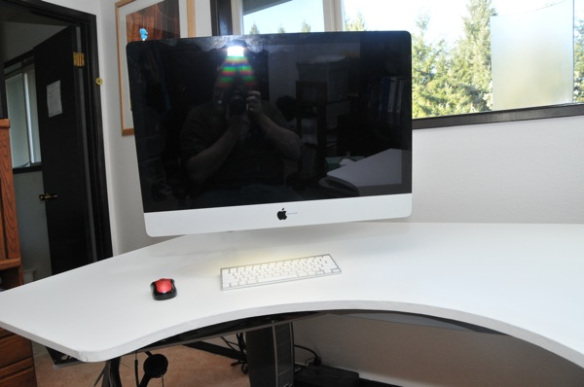
The monitor arm now swings the iMac completely out of the way of the desk.  Action shot:

And when sitting at the desk, it looks like this:
D3M 5584

How To Section:

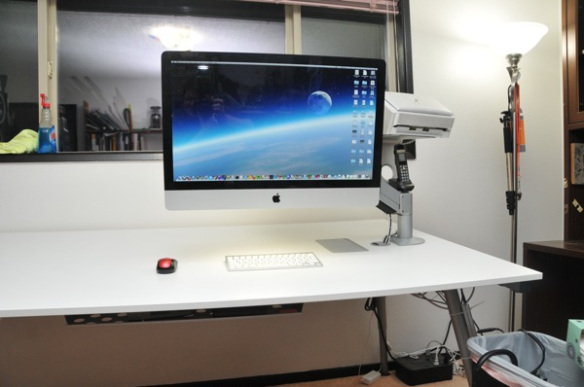
I started with this configuration:
D3M 5567

This worked OK, except that it began to bug me that the cable access door in the work surface did not do anything.  If a feature is not doing work then it is clutter by definition.  So I stripped the monitor arm off the desk, removed the power outlet and the IKEA cable management baskets, and then the un-drawer which you can just see peeking out under the work surface by the red mouse.

Then I detached the work surface, and laid under the desk sliding the surface to different places and then seeing how it *felt* from beneath and above the desk.  I had the idea to slide the desk forward and to the right to maximize the work surface overhang.

Next I started drawing curves on the surface of the desk.  Because it is a whiteboard, I was able to draw, look, erase, redraw, and play with the shape in my mind.  I like the idea of reshaping the desk with bulbous organic curves at the corners like this:
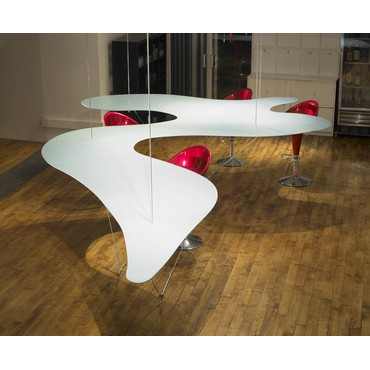
NewImageSource: Modenus.com

But, I was too chicken to cut very much out of the desk.  Because desks are experience goods, you can’t think your way to what you will love.  You have to generate and test.  So I decided to start simply with a semi-circle cut out.  Starting out the project looked like this (mr. batik supervising):

I decided to cut the cable access door plug from the semi circle and marked it with whiteboard marker.  Then I drew a 15.5″ radius semi-circle from the measured center of the front edge of the work surface.  Then cutting began with a jig saw and after the semicircle was cut out, I hustled the iMac back on to the left side of the desk this time.  I don’t know why I tried the left side of the desk.  Just happened that way.  At this point the project looked like this

Once I re-mounted the iMac on the monitor arm, I was delighted to see that shifting the work surface forward created an opening between the desk and the wall, that allows the iMac to swing behind the far edge of the work surface.  This leaves the work surface completely clear for jotting down ideas, spreading out 3×5 cards, etc.  I like the additional openness of this configuration over where I started from.  Gratifying to contemplate.

At this point I cut a grommet hole out of the semi circle and then used steel straps to mount the cable access door plug and grommet hole plug from the under side of the desk.  Action shot (sorry it is blurry):

Then I filled in all the gaps around the plugs with white plastic wood which I was very delighted to discover at HomeDepot.com.  Much sanding and re-filling and re-sanding ensued. And once I got the work surface to be “not terrible” I moved on to finishing the edge the jig saw cut.

I was surprised at how easily iron-on melamine edging went on.  Get a clothes iron, cut the length of edging you need, then slowly iron the melamine edge on to the work surface.  Took about 30 minutes from start to cleaned up.  And I’m very delighted with how the edging is staying attached.

Partial component list for desk:

Support RestartGTD by buying at Amazon.com with this link!

Abomination of Deskolation … Redeemed!

First the before pictures:

Ladies and gentlemen, 28 years in the making, RestartGTD brings you THE ABOMINATION OF DESKOLATION!

Figure 1: The Abomination of Deskolation!

IMG 0979

Figure 2: The Accompanying Office

Now the after pictures:

Figure 3: The wait, … what?

IMG 1102

Figure 4: Wow, just wow!

Figure 5: How It was accomplished

The Story:

This is John Niebergall’s desk.  John is an engineering teacher at Sherwood High School in South Portland.  As I’ve gotten to know John (i.e., seen his desk and had him over to my office to see my desk), I encouraged him to read GETTING THINGS DONE.  Over the holidays John listened to GTD three or four times via Audible, and then wanted help translating the ideas in GTD to his work processes.  I believe the specific words were “I’m a visual learner, I don’t do well reading books.  I need to see it.”

John is the target blog reader that I started RestartGTD to serve.  I’ve traveled to John’s office, carrying my Fujitsu ScanSnap S1500M (I use portable Macs), had John take down one of the three ring binders against the back wall of his office, and we scanned it into PDF.   Done!  Four minutes, and now the paper and the binder both can go in the recycle bin.   It was hard to let that first binder go.  But the liberation grows on you rapidly.  It gets easier the more space you free up in your office.

Seeing scanning is believing.  John ordered his own Fujitsu ScanSnap S1500 (PC) and I made another trip down to his office to take the scanner out of the box.  Maybe I should do a poll of how many GTDers have purchased scanners and never taken them out of the box? You know who you are! De-boxing is the key next action in getting a scanner up and contributing to your mind-like-water.

In addition to the visible things on and around John’s desk, I believe there is a second USB hub that is hidden inside the typing elevator drawer space.  And also, that there is a power adapter in that space to feed the label printer and scanner.

Reflections on Abomination’s Redemption:

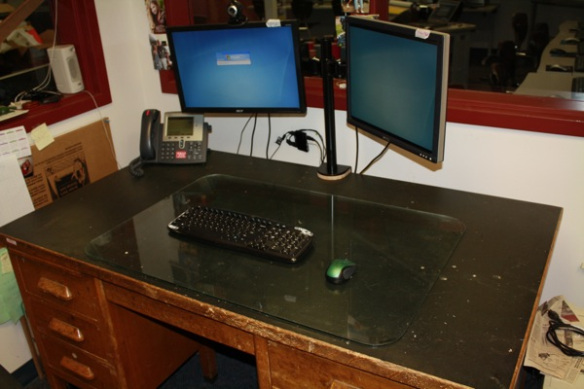
Note in Figure 1, that John had a trackball on his desk when he started GTD.  This desk makeover has shifted him to a small travel mouse. There are wireless trackballs from Logitech and Kensington, but they cost $30 more than the Logitech M305.

John chose to keep his legacy desk with leg stalls.  That is this style of desk is like a horse stall, only for your legs.  I prefer sliding side to side so that I can start parallel projects on different parts of my desk during the day as interruptions happen.  My advice to John was to cut the surface off this desk and then mount it on IKEA legs. Ikea’s desks have inexpensive cable management options, and they are simple to work with.

The glass on the desk feels disruptive to me.  Glass is cold when you put your hands and forearms on it.  I think I’d prefer to remove the glass, and then I’d probably resurface this desk with white-board-contact-paper.  White lightens the room (always welcome in Portland where we get 5.5 inches of rain per month), and gives you a place to jot notes with white board pens, so you can save paper.

John is a public school teacher who has been in Sherwood High School for 28 years.  And he is digging his way out via GTD.  Teachers, you CAN DO THIS!   If I can shift to GTD, anyone can.  The key is to start.  Don’t start big or small.  Don’t give yourself the chance to over think this.  Just start.  John got the scanner, Evernote, and then beautifully reconfigured his desk (putting the scanner on the old typewriter elevator is genius!:-) to support his workflow.

Thank you John for sharing your before after.  Anyone else interested in sharing?  Before/afters are fantastic motivators.  Email me if you have pics you are willing to share.

[email protected]