“Resistance is futile, Bill will be assimilated”


Source: IBM Wired.com, Bill Gates Wikinut.com, Steve Jobs ForcesofGeek.com, Google Searchengineland.com

Introduction:

I’ve been in the labor force for 31 years, living through four “evil empires” of computing technology.  The graph below (thank you RoyalPingdom.com!) shows the financial performance of three of the four evil empires.  

  1. In the beginning was IBM and my heroes in the microcomputer world wanted to “make a dent” by providing viable alternatives to IBM.  
  2. Next was MicroSoft, Bill Gates started his career claiming that he wanted to build a monopoly, and he darn near did it.  While in grad school I wanted a Mac, just to avoid Microsoft, but I stayed with PCs because I did not have the working person’s income to buy a Mac.  
  3. Next was Apple as it shifted the basis of competition from products (Mac vs. PC) to ecosystems (Mac + iPod + iTunes vs. PC + ???)
  4. Currently, the evil empire on the rise is Google.  
And the purpose of this blog post is to share how I’m converting my computing to Google’s ecosystem (Chrombook, Android 4.2.2, Web Apps, and Extensions).  

Source: RoyalPingdom.com

It all started with … 


Source: Amazon.com

… the $249 Samsung Chromebook (wireless).  Chrome is an operating system inside a browser.  I have a gorgeous 27″ iMac in my office on which I run Windows 7, Linux Mint, MS DOS 6, Windows XP, as well as scratch systems for Math (Linux) and Accounting (XP).  Yes, I love all the operating systems, and before buying the Chromebook I tried to install ChromeOS in VMWARE but did not succeed.   

So using the Chromebook brought a switch to a browser-eye-view of the internet.  This can be mentally jarring.  In particular, I hated web-based email.  Somehow, after 30 years of computers, it just *feels* right to have an email client program.  Safer … normal … all I need … if it ain’t broke don’t fix it … were the sequence of words coming to mind.  Aha!  I don’t want to give up my email client, and you can’t get an email client on the Chromebook.  Clients are just better and I resent being made to do webmail.  And … I’m NOT BITTER ABOUT IT!

But I’d spent my $250, I could not give up on the Chromebook just because I hate web mail.  So I used the Chromebook.  And you know, Gmail has a lot of nice features in its web client, that Mac Mail does not have.  The biggie for me is to click on a message and trash+spam-block the sender.  But, I do also adore the reply+archive message because it eliminates a step.  

And you know what else, Outlook’s webmail client (which you have to trick into giving Chrome on the Chromebook full access to) has these same features!  Hmmm … I still do not like webmail, but you have to give credit where credit is due.  

So three months pass and …

Source: http://play.google.com

I get a Google LG Nexus 4 because t-mobile sells a $30 month plan for it (with unlimited internet, unlimited texting, and 100 minutes of voice).  The handset was $350 from Google (substantially more anywhere else I’ve looked) and came with no 2 year plan obligation.  And better, it has unadulterated Android 4.2 on it.  Having had an Android 2.2 phone from a carrier, I don’t ever want to subject myself to needless Android-upgrade-envy again.  The Android carriers and Android phone makers seem to have their fingers in their ears yelling “la la la la” to themselves while the market has tired of their adulterating “improvements.”  

Anyway, now I have a very similar user experience on my phone and on my Chromebook. Drip, drip, drip, over time my aversion to webmail is dissipating.  The Google App-Device-Extensiion ecosystem is becoming seductive in the same way that the Apple iPhone was seductive when you plugged it in to your computer and it extended your digital life.  

Source: Jesus Diaz and Gizmodo

It is official, I’m being assimilated  

Bill’s fourth evil computing empire era begins.  I know that Google is:

  • tracking my every click
  • selling what they learn about me
  • shifting from open garden to walled garden 
  • big, multinational, complex, and so, likely is doing evil  

But, I don’t care.  Using Google Docs and Drive on Chromebook and Phone are simpler, lower impact, and much more handy than Apple’s walled garden.  So I’m going to surf this new ecosystem for a while, despite it probably being some kind of irreversible tragedy of the commons. The price of productivity is handcuffs.  

bill meade 

p.s. My blogging agenda for the next month will be to cover: 

  • Chromebook in more detail
  • Nexus 4 in more detail
  • Google ecosystem implications for my GTD trusted system 
  • What to do about evernote since it’s web access is useless 


Perfect GTD Desk +2: Desktopia Redux

D3M 5585

See also: The Perfect GTD Desk +1

See also The Abomination of Deskolation Redeemed 

See also: The Perfect GTD Desk

Introduction:

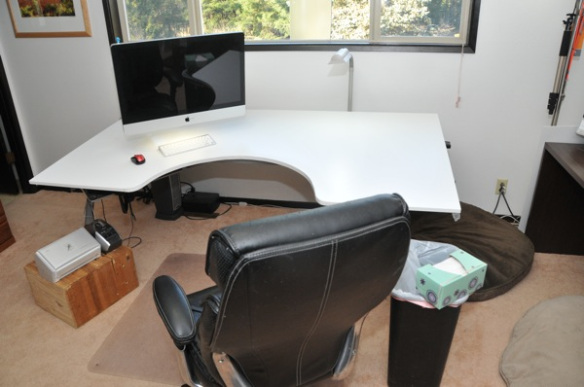
Perfect GTD desk +1 has been refactored once again.  The above action shot displays several changes:

  • The monitor arm has switched ends of the desk
  • The cable access door in the Ikea Galant Conference Table has been filled in with wood
  • Gave up on mounting the Fujitsu ScanSnap on the monitor arm.  It was cool to look at, but even cool stuff is clutter when you are trying to get work done.  So I resurrected a shipping box and mounted both the ScanSnap and the Brother label printer on the box.  So far so good, the box has not interacted with the chair legs.
  • Screwed the chair mat to the floor in the correct location with 4 2″ drywall screws.  *Bam* no more wandering chair mat!!!
  • A 15.5″ semi-circle has been cut out of the center front of the conference table.
  • To create a 15.5″ radius, the conference table was slid forward until the back edge of the desk was flush with the Galant support frame.
  • I also slid the conference table surface to the right until the left edge of the work surface became flush with the left side of the Galant support frame.  Here’s an action shot of the top left corner of the desk:
  • D3M 5586
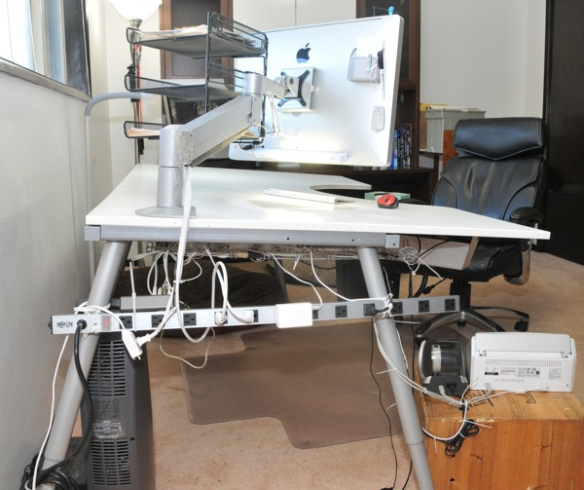
  • Power adapter moved from underneath the work surface to Galant table legs.  With diagonally crossing cable ties it was simple to mount the power adapter and then slide it around to readjust it.
  • A cordless remote control light switch was added (mid right hand of the back of the iMac) controlling the keyboard light, the floor lamp over the desk, and the floor lamp in the corner of the office.
  • The “un-drawer” was shifted left and canted at a diagonal angle from lower left hand corner of the desk, to upper right hand corner.  This removes the un-drawer from constant collisions with knees.
  • The purpose of the undrawer is to hold all the items that need to be at hand, but that clutter up the desk surface.  I have stapler, tape dispenser, utility knife, a 10 port USB hub, flash light, and my Plantronic USB headset (wireless headsets suck!).
  • Action shots:

  • USB and power were added to the right hand end of the desk (form the semi-circle side of the desk).  While I wanted usb and power plugs available, I need them to be out of sight, and they can’t be mounted under the surface without cables working their way out with gravity.  So I turned both poet and USB adapters 90 degrees and mounted them with cable ties and cable tie anchors.
  • Action shot:


 Results:

When I sit at my desk now, I’m in the semi-circle and can rest both elbows on the work surface at all times.  I can also reach a much larger proportion of the work surface.  I especially noticed the altered surface to volume ratio of the desk when I wiped it down with Windex to shoot the pictures in this blog post.  Standing in the semi-circle it is easy to wipe down the entire surface of the table.

When people try the desk out, the first word that comes out of their mouths is “Game changer!” and then “I’m going to do this to my desk!”

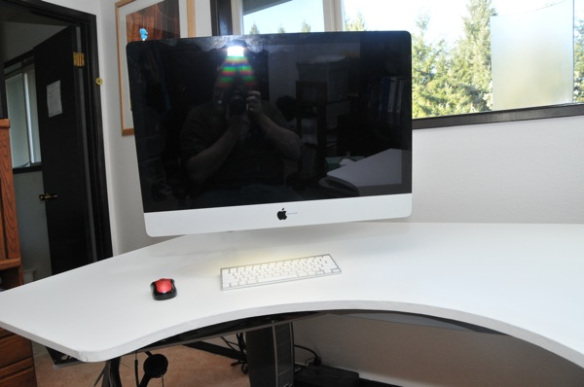
The monitor arm now swings the iMac completely out of the way of the desk.  Action shot:

And when sitting at the desk, it looks like this:

D3M 5584

How To Section:

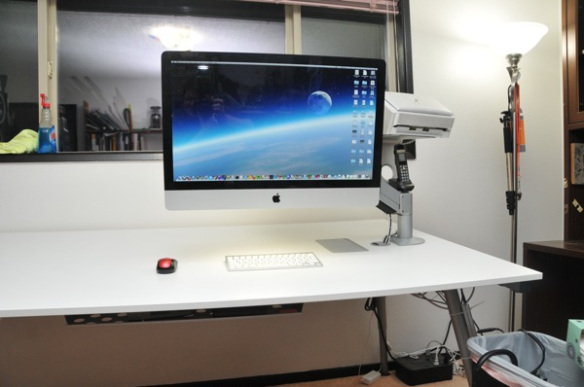
I started with this configuration:

D3M 5567

This worked OK, except that it began to bug me that the cable access door in the work surface did not do anything.  If a feature is not doing work then it is clutter by definition.  So I stripped the monitor arm off the desk, removed the power outlet and the IKEA cable management baskets, and then the un-drawer which you can just see peeking out under the work surface by the red mouse.

Then I detached the work surface, and laid under the desk sliding the surface to different places and then seeing how it *felt* from beneath and above the desk.  I had the idea to slide the desk forward and to the right to maximize the work surface overhang.

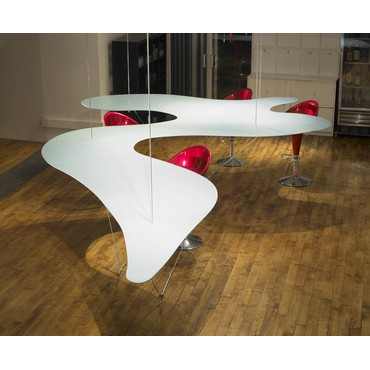
Next I started drawing curves on the surface of the desk.  Because it is a whiteboard, I was able to draw, look, erase, redraw, and play with the shape in my mind.  I like the idea of reshaping the desk with bulbous organic curves at the corners like this:

NewImageSource: Modenus.com

But, I was too chicken to cut very much out of the desk.  Because desks are experience goods, you can’t think your way to what you will love.  You have to generate and test.  So I decided to start simply with a semi-circle cut out.  Starting out the project looked like this (mr. batik supervising):

I decided to cut the cable access door plug from the semi circle and marked it with whiteboard marker.  Then I drew a 15.5″ radius semi-circle from the measured center of the front edge of the work surface.  Then cutting began with a jig saw and after the semicircle was cut out, I hustled the iMac back on to the left side of the desk this time.  I don’t know why I tried the left side of the desk.  Just happened that way.  At this point the project looked like this

Once I re-mounted the iMac on the monitor arm, I was delighted to see that shifting the work surface forward created an opening between the desk and the wall, that allows the iMac to swing behind the far edge of the work surface.  This leaves the work surface completely clear for jotting down ideas, spreading out 3×5 cards, etc.  I like the additional openness of this configuration over where I started from.  Gratifying to contemplate.

At this point I cut a grommet hole out of the semi circle and then used steel straps to mount the cable access door plug and grommet hole plug from the under side of the desk.  Action shot (sorry it is blurry):

Then I filled in all the gaps around the plugs with white plastic wood which I was very delighted to discover at HomeDepot.com.  Much sanding and re-filling and re-sanding ensued. And once I got the work surface to be “not terrible” I moved on to finishing the edge the jig saw cut.

I was surprised at how easily iron-on melamine edging went on.  Get a clothes iron, cut the length of edging you need, then slowly iron the melamine edge on to the work surface.  Took about 30 minutes from start to cleaned up.  And I’m very delighted with how the edging is staying attached.

Partial component list for desk:

Support RestartGTD by buying at Amazon.com with this link!

Perfect GTD desk +1

Screenshot 12 19 12 4 53 PM 2

Introduction:

Confession:

I’ve been holding out on http://RestartGTD.com.  :-(

I’ve been working since April 2012 on a successor to my “The Perfect GETTING THINGS DONE (GTD) Desk” post (which is the most read post on this blog).  1.5 years after we moved to the Portland area, Beth and I bought a house which allowed significant expansion of the good enough home office desk.

As a sufferer of chronic rhinosinusitis, I’ve found the need to keep facial tissues close at hand.  In fact, VERY close at hand as tissues go from box, to my face, to the trash in one choreographed motion.  So in the new house I have a GTD trash can.

And

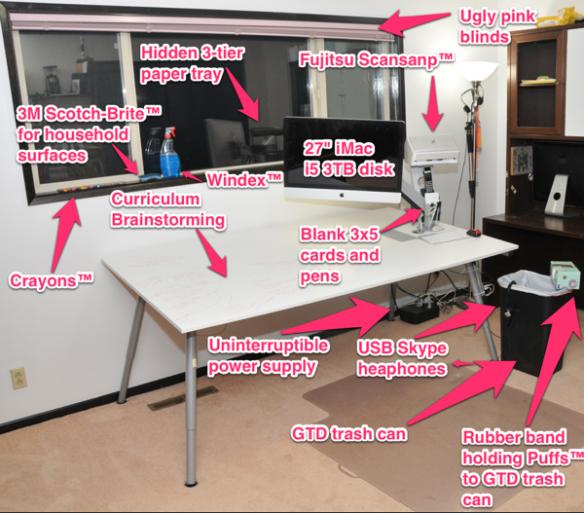
my desk work surface is expanded from a merely “big” desk into an “Ikea conference table” sized desk that is 77″x43″.  I bought yet another Innovative 7500-HD-1500 monitor arm to hold up my 27″ iMac i5. I know that $260 for an arm seems exorbitant, but getting the computer off the desk is the best money you can spend in taking back your desk.

Also, if you’ve got a wall that you are facing when you work, you can get a monitor arm for $30 that will be great for giving you back your desk.

Anyway, to be optimal, I should have gone to IKEA and bought a conference table surface for $65 in the “as is section” but, I did not realize that the components I needed for my upgrade of “The Perfect GETTING THINGS DONE (GTD) Desk” would be available in the as-is department.  So, instead of saving 35%, I bought the full price $229 brand new white GALANT conference table (instead of the $65 as is white conference table).  I bought new adjustable Galant A-legs for $15 each, but in thinking about it I could have gotten away with buying 2 new fixed length Galant A-legs for $10 each and then 2 adjustable legs.

Driver’s eye-view of the Perfect GTD desk +1

OK Bill, what is behind the monitor?

Well, as usual, there is a lot going on behind the iMac.  I’ve used cable ties to attach a 3-tier paper tray to the Innovative hd monitor arm.  *Note* because the iMac and paper tray are hanging off the monitor arm, there is an angle that I had to compensate for with the paper tray.  Why? Because if you can’t get the paper tray approximately level, then you’ll have paper splashing on to your work surface.  = Unpleasant.  Here is a shot of the angle compensating cable tie.

And the indispensable ScanSnap S1500 rests on the base of the monitor arm. It is visible, but not when I’m looking at 3×5 cards on my desk.

OK, what is going on under the desk

Excellent question!  Here is a macro shot of the under side of the desk:

Once again I’ve availed myself of IKEA to provide pseudo drawer space as well as plain Signum cable management (US$10).  The Galant cable management tray (US$5) works as a static drawer.  Desk tools that conventionally clutter up desk surfaces are verboten in my conception of the perfect GTD desk.  So, I mounted the Galant cable tray a bit back from the front of the desk (to avoid hitting it with my knees), but still in easy raeachability.

In addition to microfiber cloth, stapler, and tape dispenser which are immediately available, I also keep a pocket knife and an eraser readily at hand.

Crayons?  You think Crayons are cool?

Well, in short, … I don’t know what to think about crayons.  Crayons come with memories, fun, and … crayon mess:

NewImage

Source: MissionMission.org

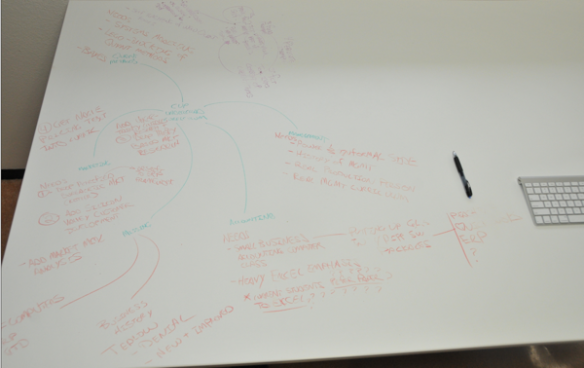
which … I’d forgotten about since I was 5.  But, still, writing on an IKEA conference table with Crayons™ is a great option if you are into crayons.  They come off with Scotch-Brite No SCRATCH sponges and Windex.

Screenshot 12 20 12 11 34 AM

Crayon mind mapping
(about moving ERP into b-education)
48 years after giving up crayons!

I felt giddy playing with crayons as a 53 year old!  The crappy wax mess that falls off the crayons, the problem of sharpening a crayon, the inevitable anger resulting from trying to sharpen a crayon in a pencil sharpener, the flash back to the 64 crayon set that had a sharpener in it (At least until you broke the first crayon off).  I found myself thinking about all the downsides of crayons as a dumb smile came over my face and I created a complex mind map that felt “just a little bit permanent.”

Buy crayons, write on your IKEA conference table, undo all the art formerly-known-as-damage, with a Scotch-Brite pad and Windex.  Fondly remember the voice of your mom yelling at you about using crayon on the table/wall/sibling.  You own the conference table, you can do with it whatever you want!!  Fun memories!

Improvements

First and foremost, except for legs, you can make-do in building your desk by shopping the AS-IS department at IKEA.  This will peel about 35% off the total cost.

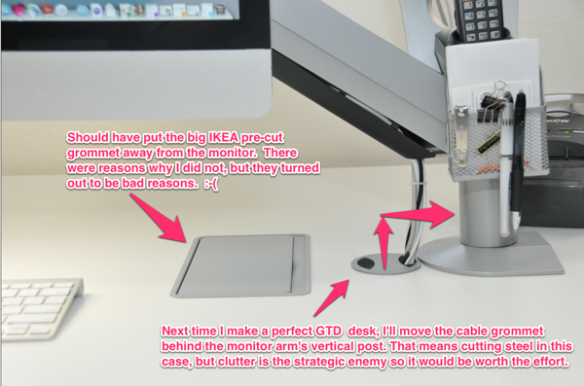
Second: grommet management.  Move the grommets away from where you will work most at your desk.  For me that is working at the computer.  And, place Signum cable grommets out of sight if you can.  You can’t control where the cable runs are, but you can control the wires between cable runs and move them out of sight.

Screenshot 12 20 12 11 22 AM 2

Third: Find a work surface that does not have a pre-cut grommet in it.  I like the simplicity of IKEA parts, but I was forced to remove the monitor arm and re-place it through the steel support deck, because the particle board of the surface was not able to carry the 50 pound load of the monitor arm and items hanging from it.

Thank you.  Thank you.  Thank you for 2012!!!

So we are just almost exactly at 1 year into http:restartgtd.com and about 130,000 page views.  The blog really started with the “The Perfect GETTING THINGS DONE (GTD) Desk” post which Lifehacker kindly picked up, and we are about at the end of the year with this Perfect GTD desk +1 post.  I’d like to thank everyone who has read, everyone who has commented, and especially everyone who has emailed back channel to [email protected] this year.  I’ve had a blast opening my GTD kimono.  And it has been fun sharing the GTD love and enthusiasm with you.

May this year bring a happier, more robust recovery, and smarter GTD thinking than any year going before.  You guys reading this rock.  Let me know how I can help in 2013!

Support RestartGTD by buying at Amazon.com from this link!


bill meade

GTD Bricolage De Jure

Introduction:

Having bought a house recently, cash flow has been at something of a premium.  So, whenever I can find a way to bing a fun improvement to my desk for no out of pocket costs, I’m very focused.  Today I had the idea that I could re-purpose the stand from my 27″ iMac, which looks like this: 

Source: Bookyard.com

to be an over desk shelf for my most excellent ScanSnap S1500M.  Here is the inverted stand on the edge of my “progeny of the Perfect GTD desk” which I will someday, post about.  

As every angle of the iMac stand is “out of plane” to attach the stand to my desk required an evolutionary step beyond my normal double sided sticky tape technology platform.  So instead of tape, I used drywall screws.  If you look in the following picture you will see 5 1″ black drywall screws loosely holding the stand to the under side of the desk, and around the corner from them, you will see two 2″ drywall screws holding the platform (was base, is now the shelf) parallel to the desk.  

Note, I am laying on the floor looking up at the underside of my desk in this shot. 

Here is another angle looking across the desk: 

And here is another angle looking across the face of the desk at the shelf and the monitor: 

Apologies for the 24″ iMac growing out of the back of the shelf in this picture.  *Note* if you have a spare 2.8 GHZ iMac motherboard from the early 2008 24″ iMac, email me at [email protected] otherwise I’m going to have to scrap this machine.  :-( 

Moment of silence 

… 

Now, back to bricolage.  Here is a shot of the ScanSnap on the shelf closed up in hibernation mode.  

And here is the scanner open and ready for action! 

More with less! 

I may have to employ double sided sticky tape to make sure the scanner does not walk off the shelf.  But I’m going to wait and see if the built in non-skid strip is enough.  I don’t like the idea of sticking my scanner down because the best way to get people to understand how great a scanner is, is to take my scanner and let friends scan their documents.  Something about scanning your own documents activates a neural pathway that description misses.  So, I’d like to preserve my free range ScanSnap if I can.  


bill meade 


Side Projects: Garden of Slow Reflections

Source: thehungercoalition.org

Introduction: 

Reading Daniel Tenner’s blog about side projects today, I had an uncharacteristic feeling of “Hmmmm.”  I have 3 of Daniel’s blog posts in my Evernote reference files at present.  The first was about picking technologies, the second was a delightful parable of “The salesman and the developer” and the third was about “How to hack the beliefs that are holding you back.”  Something I need to re-read in light of the RestartGTD conversation with Austrailia.  

All of which is to say that generally when I read Daniel, I think “Dang!  I wish I had blogged that!”  Not today however.  Today I think Daniel did not go far enough.  W00t! An opening for me to build on swombat.com!!!

Daniel’s post was building on a Post by Andrew Dumont that takes a hard line on side projects.  The hard line might be summarized visually as:

Source: Telegraph.Co.UK

See also: bentobjects.com

Here is the textual representation: 

Know that when you start just a side project, you’re starting so much more. It’ll completely consume you. The worst failure in any side project is to devote time, energy and sanity for any sustained period only to close the doors.

Side projects are a means to an end.

They need to start with an end-state in mind – create a passive income stream, validate my idea. They need to have deadlines and key metrics – six months to profitability, 10 paying users to validate my idea. But most importantly, they need to be a sprint. The longer a project lingers, the harder it becomes to keep morale high and pull the plug if it’s not working out.

Now, interpreting this passage as a blanket statement on side projects is taking Mr. Dumont out of context.  Andrew is talking about startup founders getting distracted by side projects.  A serious problem for burned out minds.  And, in his tweeting Andrew pointed out a FANTASTIC Scott Belsky essay “What Happened to Downtime? The Extinction of Deep Thinking & Sacred Space” so the above is not warmongering to extinguish side projects.  

But, it does represent a left-brained view of managing work that has become the defacto politically correct way to reason, in work groups lacking trust.  So, I liked it when Daniel took (slight) exception to Andrew’s hard line saying But if you want to start a side-project today for the heck of it? Go for it.” 

Daniel did not go nearly far enough for my tastes, which was my problem really.  But the itch created by Andrew and Daniel got me thinking about GTD and my side projects.  

The purpose of this post is to take side project ideas, immerse them in the GTD amniotic fluid, and use them to explore “side project GTD thinking.”  

GTD of Side Projects

For me, GTD side projects have been a great source of mental unburdening.  For each side project I make a manilla folder and then gather 3×5 cards and letter pages with thoughts about the side project.  Side projects started as a way to mind sweep more fully.  I did not like having isolated cards with ideas that clumped together.  So just to get the ideas off my mind I would clump them into folders.  And then, I group folders into Target Totes (see before/after and scroll down).  

When I listened to GTD and David Allen said “most people have 100 projects going but can recall only” 7+/-2, it rang true with me.  Except, I think I have way more than 100 projects going.  And these projects are not all what I’d call “core” to my work.  Many of them are projects that my brain thinks up and won’t let go of until I write them down.  

After 3 years of GTD however, I notice that side project folders have a tendency to evolve into core, focused, time-constrained projects.   When I realize that a side project is now a “core” project, I sit down in my school office, a clear desk, and the folder with the accumulated detritus of cards and pages, and then a sense of calm comes over me as I see that all the ideas my brain trusted me with, are all accounted for.  

I’ beginning to be convinced that side projects that my brain wants to build, but that do not do work for me today, are a kind of “over the horizon” work radar.  By teaching me mind-sweeping and organizing, GTD has made it possible for me to have the idea in the previous sentence. 

Previous to GTD I would stop these side projects by feeling too guilty to do anything about then when I had “real work.”  The guilt kept over the horizon projects disorganized and stuffed into my overwhelmed brain.  Mind sweeping them out gave me back creative capacity.  Organizing over the horizon ideas converted randomness into a down stream GTD by product that I can use to further increase my productivity.  And, cut stress.  When you realize an over the horizon project has just landed in your lap, opening a folder to all your ideas in one place is the opposite of stress.  Prevents guilt from getting a toe-hold to derail the work.  

Or, so it seems…  

bill meade

If you’ve read this far (thank you Daniel Tenner!) you should follow RestartGTD’s rss feed.   

p.s., Daniel Tenner and Andrew Dumont, if you feel misinterpreted by the above, let me ([email protected]) know, I’ll refine your input into the post!   


2012 Fall Semester: How the smart student will organize - Part 2 The AEER Loop Don’t worry, be crappy


Source: Toolpawnandtrade.com

In part 1 of How the smart student will organize I talked about basic infrastructure.

To get organized, you have to invest in some infrastructure.  You don’t have to invest a lot, but you must get a foundation underneath you, or you will default back to filling your brain back up with stuff that is “too important to forget.”  Once you rely on your brain not to forget, you no longer make progress in organizing.

So, after you have infrastructure and you have read the first three chapters of GTD, the journey of GTD begins.  GTD is a journey because you will refine how you implement GTD over time.  I think if the progressive refinement of GTD as the AEER loop.  In this loop, you Articulate your GTD system by picking 1.0 tools for each basic function of GTD.  Next, you use the tool, and let your Experience with the tool soak in, handle a few crises with the tool, and then you move to Evaluating the tool, and then after you’ve been reflecting on how the tool works, you Refactor your tools selection into tools 2.0.

Articulating GTD in Tools:

In GTD’s beginning are tools for seven GTD functions.  GTD’s functions are: Capturing, FilteringOrganizing, Reference Filing, TrashingDoing, and Refreshing.  What these functions are, and how they fit together will be the subject of Part 3 in this series. I introduce these functions here just to give mental place holders for the kinds of tools needed to implement GTD.  Capturing tools, filtering tools, organizing tools, reference filing tools, trashing tools, doing tools, and refreshing tools.

For example to capture all your tasks and ideas, you could use 8.5×11 paper, 3×5 cards, OmniFocus, Remember The Milk, or any of the many other capture tools that have sprung up around GTD.  In the articulation phase, you need to pick one tool for each GTD function, and then close your eyes and implement.

Why are you telling me this?

For two take-aways:

  1. Don’t over think choosing tools.
  2. If you implement GTD well, you will be evolving organization tools for a long time

You won’t stay with whatever first tools you choose so agonizing over which tool is “best,” is a time waster.  You can’t think of the optimal way to organize yourself.  GTD puts you on a path to find better and better ways to organize over time.  GTD is a mindset, not a set of tools.  David Allen’s system is a fantastic place to start, because he’s refined the system in light of thousands of people using GTD. 

The biggest point of this installment is the AEER loop that GTD allows you to implement.  You start with a tool (Articulate), you use (Experience) the tool, as you use the tool you Evaluate how it is working for you, and then, once you are comfortable that you understand the tool, you Refactor your tools.

For example, in my beginning of GTD, I put every idea on 8.5×11 paper, thence into manila folders.  As I used these tools, I began to feel uncomfortable (Experience) with them, and then to become convicted that I was wasting a lot of paper (Evaluate).  Once my vague experience had surfaced in an evaluation, I switched to OmniFocus (a GTD tool for the Macintosh).

As I experience OmniFocus, at first I was in love with having all my next actions, ideas, and projects, in one place (Experience and Evaluate).  However, once I had EVERYTHING I needed to do in one place, I became uncomfortable sitting down to the computer (Experience).  As I thought about this, I recalled David Allen saying that “If you get too organized, your brain will refuse to use the tool.”  So, I decided that over-organization could apply to me (Evaluate) and then began a step by step evolution away from 100% electronic organization, to what is probably 70% electronic organization.

Where refactoring has brought me today, is to 3×5 cards in manilla folders with an occasional printed email and an occasional 8.5×11 sheet of paper with mind maps or notes.

In the next post, I will lay out the rest of an initial set of GTD tools.  By now it should be clear to see why David Allen prefers to stay with paper and not go into technical tools: the tech tools change constantly, and they scare away many people.

Don’t worry about being crappy with GTD.  Just do it.

bill meade

2012 Fall Semester: How the smart student will organize - Part 1 Get Infrastructure

Source: CollegeMagazine.com

“Professor Meade, how should I get GTD organized for school this year?” What follows in the rest of this post, is my default advice for freshmen coming to college this fall.

Step 1: Get a laptop computer …

… with at least a 500 gigabyte hard drive.  A new hard drive is surprisingly inexpensive ($64 for 500 GB and $75 for 750 GB on Amazon as I write this) so think about adding a new hard drive to your existing laptop, or if you buy a used laptop, upgrading the hard drive.

If you have no money you still have options:

  • Option 1: Start your laptop quest at your local version of Portland’s FREEGEEK.ORG.  Since you don’t have cash, you can trade time working for FreeGeek.org, for a computer.
  • Option 2: Ask around family and friends for a laptop that is “too good to throw out, but not good enough that anyone is using it” and then put Linux Mint on it.
  • What is Linux?  A free operating system with a free clone of Microsoft Office 1997, and a large free software library.  This is the no-money-down-gtd operating system and software system.
  • Why Linux Mint and not one of the other Linuxes?  Because Linux Mint has all the drivers you need from the start, no hassles to get your DVDs to play.
If you have some money then you can:
  • Option 1: Buy a laptop at FreeGeek.org.  You can get a good enough laptop for about $180.
  • Option 2: Shop a Goodwill store in Lake Oswego OR and pick up a pretty nice laptop without hard drive (see above links to buy a big new shiny hard drive) and then install Linux Mint.  My students inform me that the Lake Oswego store has tons of laptops without hard drives.
  • Option 3: Go to Walmart and buy a cheap Netbook for $250.  I *think* you will find that the used laptop is a better value than a new netbook.  But your mileage may vary.  I don’t have a preference between Windows 7, Mac OS X, or Linux, I use them all.  The Mac has been the least work for me, that that is what I use for my laptop.
  • Option 4: Check out laptop prices at local retailers like Staples, Office Max, Best Buy.  Do this on-line so you don’t have to deal with pushy sales people.  Compare local retail to Amazon.com laptop prices for PCs and Macs.
If you have more money and want more performance:
  • Macintosh options I think look good:
    • If you want to buy a new Mac, the cheapest way I’ve found is to go to Apple’s online store and look for refurbished computers.  These will be one to three generations older than current models.  But … they are often much cheaper than new.  If you live in a city with an Apple store, buying a refurb is low risk because if you have a problem, you can schedule an appointment at the genius bar, go in, and have the Mac Geniuses fix it.  If you are worried about having long term support, you can buy an Apple extended service plan and a refurbished computer for less than the purchase price of a new mac alone.
    • If you must have a new Mac, then look around.  Portland’s Best Buy (13″ Macbook Pro for $1139) and Amazon (13″ Macbook Pro for $1,140) both often sell Macs for less than the educational price for Macs bought directly from Apple, although for the 13″ Macbook Pro, the lowest price is currently from Apple ($1,099).
  • Windows options I think look good:
    • Ultrabooks are a great value. Instead of buying an iPad and a laptop for school, or an iPad, a laptop, and a Kindle device, just get an ultrabook.  These are from $800 to $1,500 in price, they weigh about 3 pounds, and you can carry an ultrabook in a backpack without pulling your shoulder off.  Ultrabooks are also a great place to start if you want to have a wicked fast Linux machine.  *Note* I have not installed any Linuxes on any Ultrabooks, but it seems like this would be a cool thing to do.

Step 2: Do not spend money on Microsoft Office or Anti Virus.

Your college will have a “no-additional-cost” copy of Office and AV software waiting for you when you get there.  First thing that happens after you get your login to the campus network is that you’ll be able to download Office over the network and install it on your laptop.  *Handy Hint* when installing over the campus network, don’t use wireless, plug your laptop in with a good old fashioned ethernet cable.  10x faster.  Also, the campus wireless will be so clogged with other students installing Office wireless will take for.ever!

Step 3: Install your software platform for this semester:

You will need to create accounts for all of these services except FireFox and the office suites.  So the process is: install software, create account, validate account (via email) and then link account to each of the programs.  After you have installed all these tools, go back to their respective web sites, and take the tours they offer.  This will only make your brain hurt, but, the process of sprouting organizing roots is fertilized by brain pain!  So, lean into the brain pain, but don’t worry when you don’t understand everything at once.  The roots are growing….

Step 4: Get a copy of David Allen’s GETTING THINGS DONE and read THE FIRST THREE CHAPTERS ONLY. 

After they make it through the first three chapters, students usually want to read the entire book, but I advise against this.  David Allen documents a process in chapters 4 through 13 that 100% cuts you over to GTD in 3 days.

When students attempt to implement the 3-day-cut to GTD, they run out of root system, and like the seed that fell on the hard ground, get fried as life burns down their attempts to improve.  Getting organized is hard work, and is filled with setbacks.  The setbacks are why I titled this blog “restart” gtd.  Like exercising, doing GTD is restarting GTD once life has taken you off track.

This is normal.  So, what readers of GTD need is acknowledge that change will take time, that implementing GTD is an exercise in experimenting with tools.  So, a more pragmatic way to get started is to read, absorb what you can, then pick one tool to experiment with in moving your brain into the GTD groove.

My current formula for students is to have them read chapters 1, 2, and 3, and ask themselves, “How does it make sense for me to start growing some organizing roots?”  So, read 3 chapters, and think about how they apply to you.

Step 5: Start classes and let GTD percolate.  Give yourself a month before coming back to GTD.

Your subconscious will be working on understanding GTD, understanding school, and figuring out how to bring the two together.  So, don’t force yourself to implement anything in GTD, just let time work for you as you compost the David Allen model.

Step 6: Finish building your GTD 1.0 infrastructure

In addition to the above infrastructure, you need a study area.  If you have space for a desk, that is a great study area, but most students don’t have space for a desk, so instead, find a conference room, or table, or study carrel where you are comfortable and can work.  Think of this place as home base for your work.

Next, get a briefcase desk organized.  You may want to check out my restart GTD post on my briefcase desk.  But the goal here is to consolidate everything you need to do your college work in your briefcase.  Think of your briefcase as a “station” that you can do all of your homework at.  Everything you need to do homework, should be in the station:

  • Blank 3×5 cards (20) and 8.5×11 paper (10)
  • One in-box manilla folder to gather ideas as you work
  • Foam ear plugs to block out noise.  You can also use in-ear headphones, but listening to music costs you about 10% of your productivity while studying, so foam is more efficient.
  • 2 pens and/or pencils as you prefer
  • Space in briefcase to hold your laptop and power adapter
  • Microfiber cloth to keep your device screens clean

In the next installment of GTD for students I’ll introduce the idea of articulating GTD, which takes a GTD process and builds a system for that process.  For example, GTD’s “one idea, one piece of paper” can be implemented with 8.5×11 paper or 3×5 paper or 4×6 paper, or with an electronic note.  Articulating is the process of thinking about how you could implement GTD processes, and then picking one articulation of that process.

No Money Down GETTING THINGS DONE!

Introduction!

Taught my “Getting (re)started with GTD” class last weekend.  One student needed to apply GTD without cash out of pocket.  So, I’ve been thinking about how to get started with GTD without spending anything.     

So, below please find the GTD office available for no money down (but you have to drive to pick everything up, so alas, there are time and gas costs included) available in Portland on 2012/04/25.  *Note* the links to Craigslist don’t live long, but they worked when I wrote this post.  More important items have the picture that was up with the post.  

An office, for free?

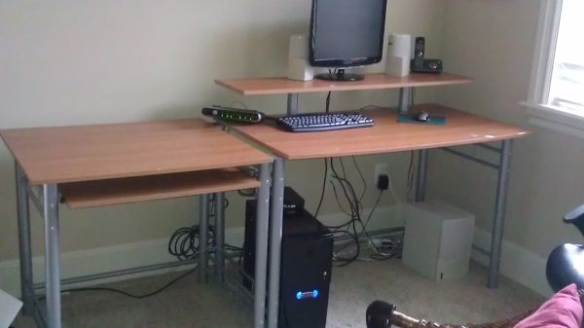
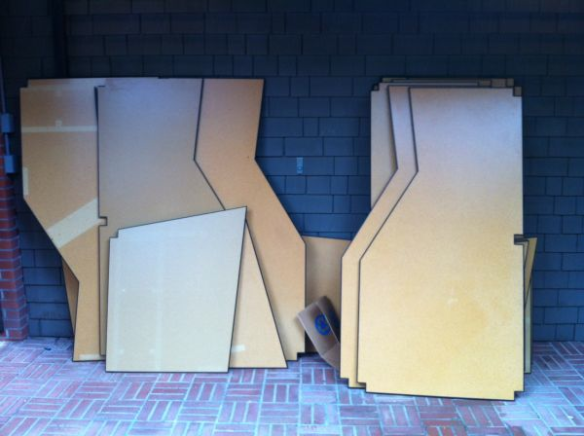
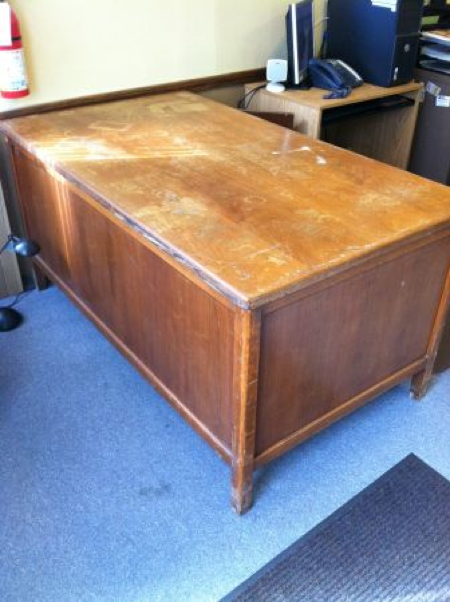
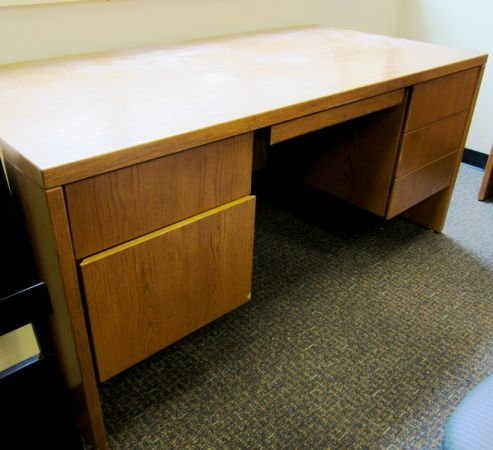
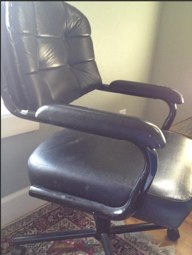
Step 1: Get a desk.  Portland’s Craigslist is a treasure trove of free desk options.  For example:

NewImage

Source: Portland Craigslist Free

NewImage

Source: Portland Craigslist Free

NewImage 

Source: Portland Craigslist Free

NewImage

Source: Portland Craigslist Free

Step 2: Get organizing supplies like:

  • hanging file folders (Urban League of Portland)
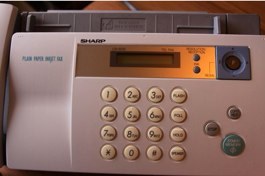
  • home fax machine (Sharp plain paper inkjet fax from Vancouver WA - home of HP inkjets!) Homefax 1
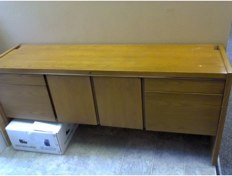
  • A wood credenza to boost your desk space up to 30 square feet and give you some drawers and cabinets to organize withWoodcredenza 1
With all the free stuff listed to this point in the blog post, you have everything you need to implement GTD with a manual system.  But, you are not limited to a manual system.  Using community provided computers (libraries, coffee shops) you can digitize much of your GTD system, especially the pieces of your system that interact with your colleagues and peers.  So, on to step 3 … 
 
 Step 3: Take advantage of free electronic infrastructure.   
  • Evernote free account gives you 60 megabytes of upload a month for no charge.
  • Google Drive/Docs Gives you an MS Office substitute, and a Dropbox substitute.  Also gives you email, streaming music from the net, picture editing, and picture web hosting, etc., etc., etc.  And, if you don’t own your own computer, this will allow you to share and store documents with your class mates and you can access your stuff from any web connected computer.  *Note* Concordia University where I teach, allows students to check out Dell laptops with wireless in the library and at the computer help desk.  We also have computer labs to provide access to the internet.  
  • MicroSoft SkyDrive which currently gives you 25 gigabytes of cloud storage for 1 year for free.  Sign up and then go to account upgrades and take the free upgrade from 5 gigabytes (normal storage available) to 25 gigabytes.  
  • Kindle Reader.  If you don’t own your own laptop, you can still download (thousands of) free Kindle books and read them with Amazon’s Cloud reader.  If you have a laptop, you can download the free Kindle software (PC Mac) and read books on your computer and up to 5 other devices (phone, iPad, Cloud reader, etc.).  

 Conclusion:

The basic infrastructure you need to start implementing GTD is available all around you if you live in or near Portland Oregon.  Probably, the bigger the city, the better infrastructure available.  Even though I thought I “knew” about craigslist and free cycle I did not realize how rich these are as resources to get people booted up on GTD.  
 
Hope this helps!
 
bill meade 


Abomination of Deskolation … Redeemed!

First the before pictures:

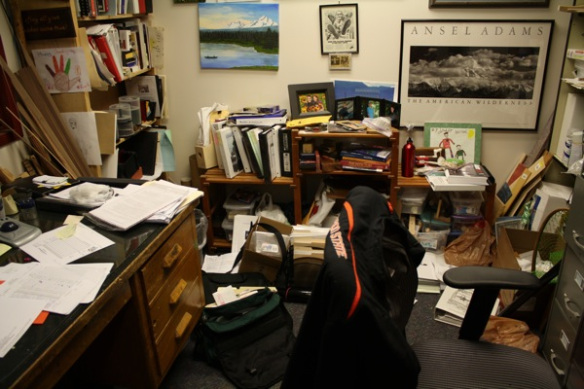
Ladies and gentlemen, 28 years in the making, RestartGTD brings you THE ABOMINATION OF DESKOLATION!

Figure 1: The Abomination of Deskolation!

IMG 0979

Figure 2: The Accompanying Office

Now the after pictures:

Figure 3: The wait, … what?

IMG 1102

Figure 4: Wow, just wow!

Figure 5: How It was accomplished

The Story:

This is John Niebergall’s desk.  John is an engineering teacher at Sherwood High School in South Portland.  As I’ve gotten to know John (i.e., seen his desk and had him over to my office to see my desk), I encouraged him to read GETTING THINGS DONE.  Over the holidays John listened to GTD three or four times via Audible, and then wanted help translating the ideas in GTD to his work processes.  I believe the specific words were “I’m a visual learner, I don’t do well reading books.  I need to see it.”

John is the target blog reader that I started RestartGTD to serve.  I’ve traveled to John’s office, carrying my Fujitsu ScanSnap S1500M (I use portable Macs), had John take down one of the three ring binders against the back wall of his office, and we scanned it into PDF.   Done!  Four minutes, and now the paper and the binder both can go in the recycle bin.   It was hard to let that first binder go.  But the liberation grows on you rapidly.  It gets easier the more space you free up in your office.

Seeing scanning is believing.  John ordered his own Fujitsu ScanSnap S1500 (PC) and I made another trip down to his office to take the scanner out of the box.  Maybe I should do a poll of how many GTDers have purchased scanners and never taken them out of the box? You know who you are! De-boxing is the key next action in getting a scanner up and contributing to your mind-like-water.

In addition to the visible things on and around John’s desk, I believe there is a second USB hub that is hidden inside the typing elevator drawer space.  And also, that there is a power adapter in that space to feed the label printer and scanner.

Reflections on Abomination’s Redemption:

Note in Figure 1, that John had a trackball on his desk when he started GTD.  This desk makeover has shifted him to a small travel mouse. There are wireless trackballs from Logitech and Kensington, but they cost $30 more than the Logitech M305.

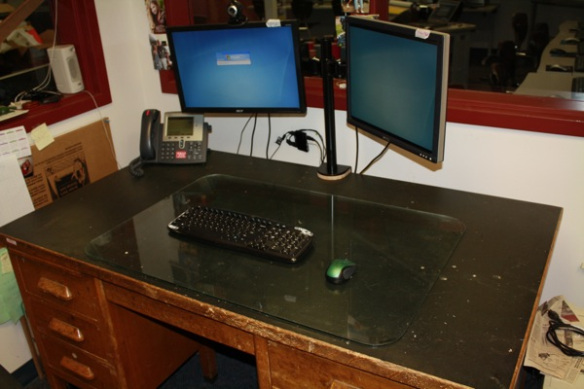
John chose to keep his legacy desk with leg stalls.  That is this style of desk is like a horse stall, only for your legs.  I prefer sliding side to side so that I can start parallel projects on different parts of my desk during the day as interruptions happen.  My advice to John was to cut the surface off this desk and then mount it on IKEA legs. Ikea’s desks have inexpensive cable management options, and they are simple to work with.

The glass on the desk feels disruptive to me.  Glass is cold when you put your hands and forearms on it.  I think I’d prefer to remove the glass, and then I’d probably resurface this desk with white-board-contact-paper.  White lightens the room (always welcome in Portland where we get 5.5 inches of rain per month), and gives you a place to jot notes with white board pens, so you can save paper.

John is a public school teacher who has been in Sherwood High School for 28 years.  And he is digging his way out via GTD.  Teachers, you CAN DO THIS!   If I can shift to GTD, anyone can.  The key is to start.  Don’t start big or small.  Don’t give yourself the chance to over think this.  Just start.  John got the scanner, Evernote, and then beautifully reconfigured his desk (putting the scanner on the old typewriter elevator is genius!:-) to support his workflow.

Thank you John for sharing your before after.  Anyone else interested in sharing?  Before/afters are fantastic motivators.  Email me if you have pics you are willing to share.

[email protected]