3″x5″ Cards and Manila Folder GTD Startup

Introduction:

I had a request after yesterday’s post on clutter, to show the basic 3”x5” card and manila folder system that I urge people to implement GETTING THINGS DONE (GTD hereafter) with. This post’s purpose is to answer any questions about 3”x5” and manila as I implement GTD.

Your mileage will vary on my advice.  In fact, over time, my mileage with 3”x5” cards and manila folders has varied. The goal is to find a natural and expressively powerful way for your brain to work, not to rigidly adopt ideas. Right now I use a hybrid paper and computer (Evernote + Dropbox/Google Drive) GTD system.  But, I reserve the right to go 100% electronic in OmniFocus in the future, or 100% paper. If it feels good, do that!

Cards and Folders:

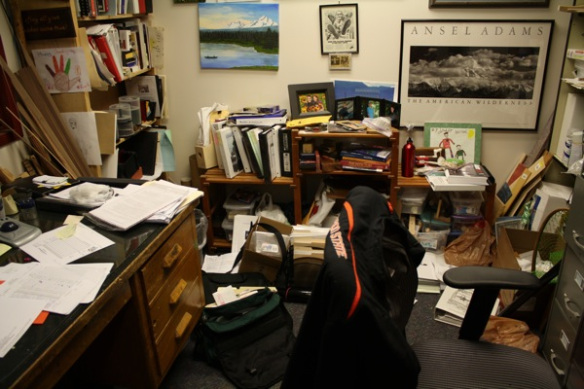
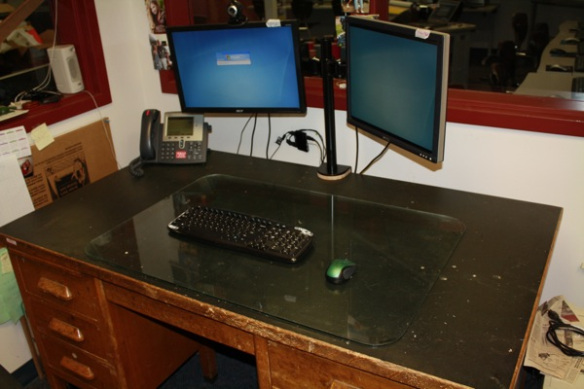
So, I helped an accountant implement GTD. Before GTD the accountant was very organized, in fact, almost over-organized.  Take a look at the desk before and after the GTD makeover:

Accountant Before

And then, we scanned all reference materials into Evernote, recycled the paper, and set up a simple manila folder project system with one folder for each project, and all materials (letter paper, post it notes, etc.) captured within folders.

Accountant After

Note the differences in the same cube. By switching note taking 100% to 3”x5” cards, ideas (one idea, one piece of paper) become mobile. Prior to 3”x5” cards, notes were taken in spiral bound notebooks and post it notes.

Spiral bound notebooks trap ideas in random order (see GTD page 30 where David Allen says “written notes need to be corralled and process instead of left lying embedded in stacks”) and post it notes seem like such a good idea when you are capturing the idea, but who knows where they go (with missing socks in the dryer?) when you need to refer back to them.

The basics of a GTD 1.0 makeover:

  • All object cleared from workspace where they can be seen in main working position (usually looking at a monitor). The single worst thing you can have in front of you when you is a picture of a person. Your subconscious can’t stop itself from processing faces. If you must have pictures move them out of view of your main work position.
  • Manila folder system kept outside field of view in main working position. In the after, the manila folders are at far left of the desk.
  • All reference materials scanned and entered into Evernote. All project materials gathered into manila folders. Please stop second guessing yourself and order the ScanSnap iX500 so you can finally get this over with.
  • *Note* Reference folders and project folders are PROFOUNDLY different. David Allen specifies supporting references be kept out of sight (GTD page 38) so having Evernote capture all of your materials is great.  Besides, you don’t have to figure out how to move a filing cabinet into your office. And even better, you can take a filing cabinet out of your office!

And, … that is it.

How It Works:

You have an idea, you write the idea down on a 3”x5” card. One idea, one piece of paper, simple really!

Now, where do you put the 3”x5” card? If you don’t have a project that this idea is related to, you need to create a project. To do this I print a folder label on my Brother QL-700 label printer (link to Amazon for convenience but OfficeMax is cheaper). The print dialog looks like this:
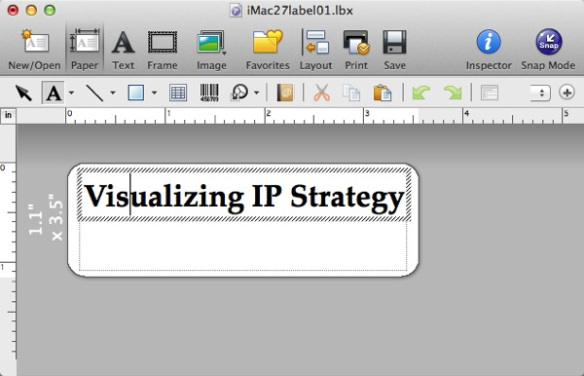
IMac27label01 lbx

Then I print the label (2.5 seconds) and attach to the manila folder. Giving me a nice neat folder to hold my project.

Next, you can put the 3”x5” card you created inside this folder. But now where do we put the folder? My answer is to buy itso small bins from Target …
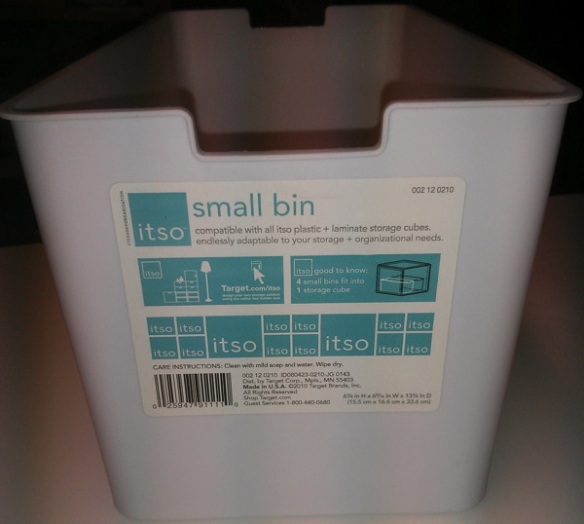
IMG 20131230 213627

And then insert a small metal book-end inside …

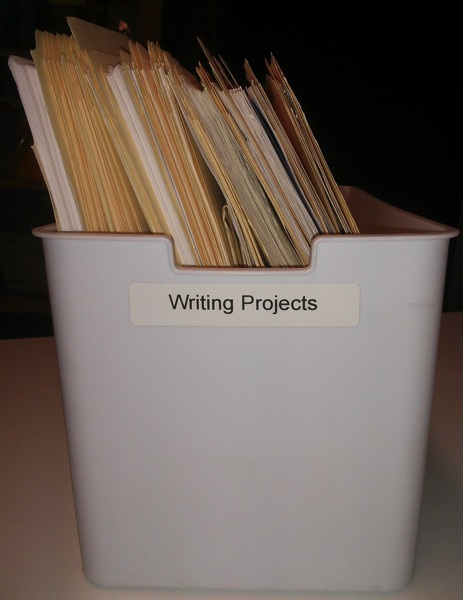
and then accumulate project “clumps” in the itso tote.  Here is an itso tote with my current clump of writing projects.
IMG 20131230 203109

You can see that the book-end prevents folders from becoming bowed.

The Payoff:

For me, the payoff from organizing projects in this way happens once I sit down to do the project.  I take the folder, open it up, and then I can spread out all the ideas I’ve accumulated about the project. When I see that all my ideas are where they should be, I get a subconscious jolt of affirmation. Aaaahhhhhh all the ideas are here. Now, let’s go!

bill meade

GTD technology deal alert!!!!

If you are a true GTDer and you are tired of how long it takes to make a folder label (A folder a minute?  Really, you think that is fast?), or if you are maybe-wanna-be-GTDer who hasn’t been able to pull the trigger on a label maker or label printer.  There is a good deal right now at Office Depot:

http://www.officedepot.com/a/products/249234/Brother-QL-700-Label-Printer/

and the little bird that told me about this deal also told me that s/he when into the Office Depot store, and negotiated the price of a ScanSnap S1500 down to $390!!!  Normally ScanSnaps are $416 Win and $419 Mac at Amazon.  

And, little bird is going to order the scanner [i’m guessing got a special code] on Office Depot’s web store.  So the moral of this story is if you a negotiation kind of person, you can *maybe* go into Office Depot and pull the trigger on that ScanSnap you’ve had in your Amazon cart, but could not click the order button on.  :-) 

bill meade 

p.s., If there are other little birds out there that see deals on GTD stuff, please email me [email protected] and let me know. I can’t turn into another http://www.dealnews.com site, but GTD stuff is hard to find discounted.  And the discounts may make wanna-be-GTDers do the next action of building GTD infrastructure.  


How not to set up a Brother QL-570

Introduction

I had this great idea!  Take the QL-570 label printer that is 4x as fast as David Allen’s alphanumeric label printer, and mount it on the under side of my desk.  Then, whenever I print a label, I can just put my hand under my desk, wait for the label to drop into my hand, and *poof* a no-look label! 

The “mr blurry cam” picture looks like this: 

To take this picture, I am laying on the floor, looking up at the under-side of my desk.  The QL-570 is in the lower right hand corner.  The silver objects are the Galant Legs and the white surface is the under side of the Galant conference table that has become SON OF THE PERFECT GTD DESK.  

Don’t do this at home

First, because the rolls of Brother file folder labels will not stay secure when the printer is upside down.  And second, because even if you secure the folder label tape into the printer, the paper handling and printing mechanisms don’t work upside down.  :-(

But, it was fun with double sided sticky tape!  And, if this had worked, I would have removed one more item of visual clutter from around my desk.  


bill meade 

Abomination of Deskolation … Redeemed!

First the before pictures:

Ladies and gentlemen, 28 years in the making, RestartGTD brings you THE ABOMINATION OF DESKOLATION!

Figure 1: The Abomination of Deskolation!

IMG 0979

Figure 2: The Accompanying Office

Now the after pictures:

Figure 3: The wait, … what?

IMG 1102

Figure 4: Wow, just wow!

Figure 5: How It was accomplished

The Story:

This is John Niebergall’s desk.  John is an engineering teacher at Sherwood High School in South Portland.  As I’ve gotten to know John (i.e., seen his desk and had him over to my office to see my desk), I encouraged him to read GETTING THINGS DONE.  Over the holidays John listened to GTD three or four times via Audible, and then wanted help translating the ideas in GTD to his work processes.  I believe the specific words were “I’m a visual learner, I don’t do well reading books.  I need to see it.”

John is the target blog reader that I started RestartGTD to serve.  I’ve traveled to John’s office, carrying my Fujitsu ScanSnap S1500M (I use portable Macs), had John take down one of the three ring binders against the back wall of his office, and we scanned it into PDF.   Done!  Four minutes, and now the paper and the binder both can go in the recycle bin.   It was hard to let that first binder go.  But the liberation grows on you rapidly.  It gets easier the more space you free up in your office.

Seeing scanning is believing.  John ordered his own Fujitsu ScanSnap S1500 (PC) and I made another trip down to his office to take the scanner out of the box.  Maybe I should do a poll of how many GTDers have purchased scanners and never taken them out of the box? You know who you are! De-boxing is the key next action in getting a scanner up and contributing to your mind-like-water.

In addition to the visible things on and around John’s desk, I believe there is a second USB hub that is hidden inside the typing elevator drawer space.  And also, that there is a power adapter in that space to feed the label printer and scanner.

Reflections on Abomination’s Redemption:

Note in Figure 1, that John had a trackball on his desk when he started GTD.  This desk makeover has shifted him to a small travel mouse. There are wireless trackballs from Logitech and Kensington, but they cost $30 more than the Logitech M305.

John chose to keep his legacy desk with leg stalls.  That is this style of desk is like a horse stall, only for your legs.  I prefer sliding side to side so that I can start parallel projects on different parts of my desk during the day as interruptions happen.  My advice to John was to cut the surface off this desk and then mount it on IKEA legs. Ikea’s desks have inexpensive cable management options, and they are simple to work with.

The glass on the desk feels disruptive to me.  Glass is cold when you put your hands and forearms on it.  I think I’d prefer to remove the glass, and then I’d probably resurface this desk with white-board-contact-paper.  White lightens the room (always welcome in Portland where we get 5.5 inches of rain per month), and gives you a place to jot notes with white board pens, so you can save paper.

John is a public school teacher who has been in Sherwood High School for 28 years.  And he is digging his way out via GTD.  Teachers, you CAN DO THIS!   If I can shift to GTD, anyone can.  The key is to start.  Don’t start big or small.  Don’t give yourself the chance to over think this.  Just start.  John got the scanner, Evernote, and then beautifully reconfigured his desk (putting the scanner on the old typewriter elevator is genius!:-) to support his workflow.

Thank you John for sharing your before after.  Anyone else interested in sharing?  Before/afters are fantastic motivators.  Email me if you have pics you are willing to share.

[email protected]