GTD: Problems Are Opportunities

Warm Booting GTD: Building A New Trusted System

IMG_20140717_131307

≈ New Job Desk 1.0

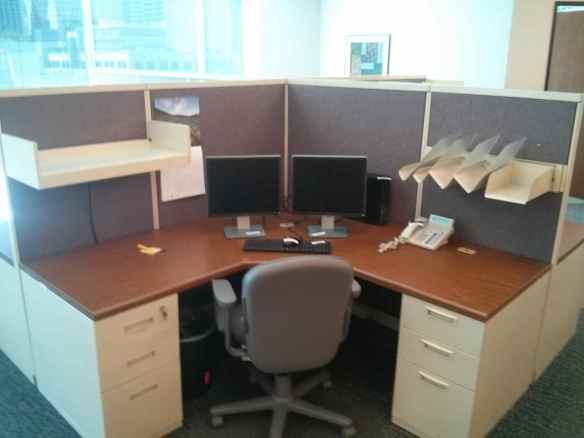
Just finished my first week at a new job. I’m now a senior data analyst at a health insurance company. The above picture is not my desk (once again I’ve neglected to take EXACT before pictures of my desk projects). But, the above desk is in the same position vs the window, on the same floor, and pretty much the same shelving and monitor setup as my new work desk, when I started on 2014/07/14.

New Job = New Set of Constraints on Organizing

I’ve worked with engineers (software, chemical, nuclear, mechanical, electrical, industrial, ….), and even worked inside a legal department once. But this is my first time working with: (a) actuaries and (b) health data. So there are a couple of constraints thrown into my GTD trusted system’s design:

  • No Evernote allowed
    Installing Evernote would break data security rules and get me fired. Too bad as I am a huge fan of Evernote.
  • Trusted system hermetically sealed great wall of China
    My work trusted system must be separate from the system I’ve built up over the past five years. This is interesting because the result at first cut, is a severing of my personal life from work. David Allen says this can’t really be done. We’ll see how big a GTD impact separate hermetically sealed trusted systems are.
  • No spending money
    Very strong culture of minimizing costs.

First law of marketing is that problems are opportunities. So setting up a new GTD system with constraints, is always fun. It is the constraints that set you free. (*Note* I’m pretty sure that Mr. Bartlett my Jr. year in high school said that “Beethoven said ‘The rules set you free'” but I’ve never been able to track that quote down. So, if you know who really said it, please email me at [email protected] and I’ll update the attribution here.).

Time for GTD Eduction! That is e-duc-tion (as in e-quack-tion … not education)

  "In his enchanting novel, A High Wind in Jamaica, Richard Hughes
describes a group of children who have been kidnapped by pirates on
the high seas and are stowed away in the ship’s cabin. One little
girl is lying there, staring at the wood grain of the plank wall 
next to her. She sees all sorts of shapes and faces in the grain, 
and starts outlining them in pencil. A whole fantastic scene 
appears. 
We’ve all done this kind of doodling: projecting shapes onto
something, then fixing and cleaning up the outlines so that the 
raw material comes to really look like what we imagine it to be.
When the child completes the gestalt of the wood grain, there is 
an encounter between the patterns given by the seemingly random 
swirls of wood grain residing outside the child and the patterns 
given by the child’s inner nature. The wood grain (or tree, or 
rock, or cloud) educes, or draws out of the child, something 
related to what the child knows, but that is also more or 
different than what the child knows because the child is both 
assimilating the outside pattern ... and accommodating 
... to the outside pattern. 
Here we can see why in the process of making artwork we are able 
to generate ... surprises. The artist has ... training, 
... style, habits, personality, which might be very graceful and 
interesting but are nevertheless somewhat set and predictable. 
When, however, [s/]he has to match the patterning outside him with 
the patterning [s/]he brings within his own organism, the crossing
or marriage of the two patterns results in something never before 
seen, which is nevertheless a natural outgrowth of the artist’s 
original nature. A moire, a crossing or marriage of two patterns, 
becomes a third pattern that has a life of its own. Even simple 
moires made from straight lines look alive, like fingerprints or 
tiger stripes."
Nachmanovitch, Stephen (1991-05-01). Free Play: Improvisation in 
Life and Art (Kindle Locations 1025-1041). Penguin Group US. 
Kindle Edition. BOLD, link to moire and [s/] added.

So bring on the constraints in educing a trusted system! The more constraints, the weirder the constraints, the greater the “surprises” in the GTD system.

In my next post I’ll describe the new GTD workflows which I’m evolving, and share more pictures.

bill meade


3″x5″ Cards and Manila Folder GTD Startup

Introduction:

I had a request after yesterday’s post on clutter, to show the basic 3”x5” card and manila folder system that I urge people to implement GETTING THINGS DONE (GTD hereafter) with. This post’s purpose is to answer any questions about 3”x5” and manila as I implement GTD.

Your mileage will vary on my advice.  In fact, over time, my mileage with 3”x5” cards and manila folders has varied. The goal is to find a natural and expressively powerful way for your brain to work, not to rigidly adopt ideas. Right now I use a hybrid paper and computer (Evernote + Dropbox/Google Drive) GTD system.  But, I reserve the right to go 100% electronic in OmniFocus in the future, or 100% paper. If it feels good, do that!

Cards and Folders:

So, I helped an accountant implement GTD. Before GTD the accountant was very organized, in fact, almost over-organized.  Take a look at the desk before and after the GTD makeover:

Accountant Before

And then, we scanned all reference materials into Evernote, recycled the paper, and set up a simple manila folder project system with one folder for each project, and all materials (letter paper, post it notes, etc.) captured within folders.

Accountant After

Note the differences in the same cube. By switching note taking 100% to 3”x5” cards, ideas (one idea, one piece of paper) become mobile. Prior to 3”x5” cards, notes were taken in spiral bound notebooks and post it notes.

Spiral bound notebooks trap ideas in random order (see GTD page 30 where David Allen says “written notes need to be corralled and process instead of left lying embedded in stacks”) and post it notes seem like such a good idea when you are capturing the idea, but who knows where they go (with missing socks in the dryer?) when you need to refer back to them.

The basics of a GTD 1.0 makeover:

  • All object cleared from workspace where they can be seen in main working position (usually looking at a monitor). The single worst thing you can have in front of you when you is a picture of a person. Your subconscious can’t stop itself from processing faces. If you must have pictures move them out of view of your main work position.
  • Manila folder system kept outside field of view in main working position. In the after, the manila folders are at far left of the desk.
  • All reference materials scanned and entered into Evernote. All project materials gathered into manila folders. Please stop second guessing yourself and order the ScanSnap iX500 so you can finally get this over with.
  • *Note* Reference folders and project folders are PROFOUNDLY different. David Allen specifies supporting references be kept out of sight (GTD page 38) so having Evernote capture all of your materials is great.  Besides, you don’t have to figure out how to move a filing cabinet into your office. And even better, you can take a filing cabinet out of your office!

And, … that is it.

How It Works:

You have an idea, you write the idea down on a 3”x5” card. One idea, one piece of paper, simple really!

Now, where do you put the 3”x5” card? If you don’t have a project that this idea is related to, you need to create a project. To do this I print a folder label on my Brother QL-700 label printer (link to Amazon for convenience but OfficeMax is cheaper). The print dialog looks like this:

IMac27label01 lbx

Then I print the label (2.5 seconds) and attach to the manila folder. Giving me a nice neat folder to hold my project.

Next, you can put the 3”x5” card you created inside this folder. But now where do we put the folder? My answer is to buy itso small bins from Target …

IMG 20131230 213627

And then insert a small metal book-end inside …

and then accumulate project “clumps” in the itso tote.  Here is an itso tote with my current clump of writing projects.

IMG 20131230 203109

You can see that the book-end prevents folders from becoming bowed.

The Payoff:

For me, the payoff from organizing projects in this way happens once I sit down to do the project.  I take the folder, open it up, and then I can spread out all the ideas I’ve accumulated about the project. When I see that all my ideas are where they should be, I get a subconscious jolt of affirmation. Aaaahhhhhh all the ideas are here. Now, let’s go!

bill meade

Get “IT” Off Your Desk!!!


Source: Ebay

Introduction:

I’m always on the lookout for paper trays that get paper off my desk, so the entire surface is free to organize 3×5 cards on.  Ken in a comment pointed to a very interesting family of off-the-desk products.  Purpose of this post is to show the product family off and point out the relative cost-effectiveness of these desk accessories compared to say … Steelcase desk accessories.  

The accessories:

In addition to the three tray unit for $40 above, there is a two tray unit for $30 … 

And a two tray + phone organizer for $40 … 

NewImage

A formidable six tray unit for $40 (the unit that Ken alerted me to) … 

Screenshot 6 26 13 9 20 AM

Note that the paper trays are rotated 90 degrees from their orientation in the three tray organizer, so it looks like the trays can be mounted to the tower, from either side, or the tray’s back.  

A rotary catalog + paper tray organizer for $40 … 

Screenshot 6 26 13 9 22 AM

And to mix it up a little, a catalog + phone organizer for $80 …  

For comparison, here is a Steelcase task light for … $340!   

Screenshot 6 26 13 9 29 AM

So what? 

These desk accessories are significant because, like monitor arms, they allow you to clear the surface of your desk.   Here is my desk before monitor arm: 

D3M 3218

Here is my desk after monitor arm:  

D3M 5534

Having the monitor off the desk surface allows a dramatic increase of usable desk space.  Having a monitor arm allowed me to write on my desk or sort 3×5 cards (my atomic unit of thinking) without restraint.  

My desk surface is an IKEA conference table, so it provides a lot of space.  I used this table for a year and then on impulse leaned over the desk and stretched my arms to see how much of the surface area I could reach: roughly 40%.  I composted this for a few months and then with the help of my cats … 

I cut out a plug for the mandatory hole in IKEA conference tables, and then diagrammed a semi-circle of 15″ at the middle of the desk:  

and then cut it out:

D3M 5580

Then bought white edging material at Home Depot that I ironed on to the raw edge of the cut. 

 With the cut-out I can now reach 80% or so of the remaining desk.  Of course I have lost some usable desk space from the cut out, but I have gained much more use of the remaining desk space.  For example, without the cutout, I needed to push my keyboard 14″ or so from the edge of the desk in order to get my forearms on the table (my perfect ergonomic position for typing).  As I type this my keyboard is about 5″ from the top of the cut out, and my forearms are just wresting over the edge of the cutout.  Comfy! 

So what? 

The signal in the noise of this post is that if you work at it, you can get your desk clear, you can improve the usability of your desk, you can be more organized and more comfortable at the same time.  The more of your desk you can use, the more focused your work can be.  

bill meade  


The Mess Is The Masterpiece

Source: Bernard Pras via
AmusingPlanet.com

Introduction:

“I organize, therefore I am” but, … there is just no way to stay ahead of the mess.  Having just consolidated two offices with five thousand books into one office plus overflow into a 14 foot wall in the living room, I’ve been submerged for a month.  Purpose of this article is articulate some of the lessons learned in this personal “mother of all GTD re-organizations.” 

Lessons Learned: 

  1. Move first, organize after 
  2. Don’t over-think
  3. Get help from people three decades younger than you
  4. Remember problems are opportunities
  5. Let go of fear (that you will hate the office you end up with) 
  6. Organize in layers 
  7. These lessons apply in other domains

1. Move first, organize after  

It will happen whether you want it to or not.  When you move, you will reach the point where you need to get the atoms part over with, regardless of the consequences to your perfect GTD system.  Do not stress about this.  Just get the initial move over, and stack the boxes 2x higher than you think you need to in order to get everything in to the new place. 

Whenever I move my books I live for about an hour in a fantasy of how I will keep the books on the same book shelves before and after the move.  And further, keep the book shelves in the same order.  My library is 100% stored in stackable 3 tier collapsable book shelves.  I number the book shelves as 1 Lower, 1 Upper, 2 Lower, 2 Upper, etc.  And my theory is that I can mark these book case numbers on the boxes used to move the books, but it never works out.  My fantasy dies before the 3rd box of books is packed. 

I’ve decided to be good with this.  

Having disorganized books is a great opportunity to review your library (see 4 Problems are opportunities).  This time re-organizing, I’m pulling out all the books I’ve purchased but “not gotten to” and putting them into a single book case.  Concentrating these books has led to a reduction in stress.  “To read” organized in one place, is an organized project. Organized projects are always less stress than dis-organized projects.    

2. Don’t over-think

Source: XKCD.com

I am an over-thinker.  I thoroughly enjoyed reading WOMEN WHO THINK TOO MUCH by  Susan Nolen-Hoeksema.  Whenever you move, uncertainty is fanning the flames of over-thinking, over-forecasting, fearing-disasters, and over-working.  Uncertainty is just uncertainty, a temporary experience that will dissipate as you land and start bringing order to the chaos.  When you think you *might* be over-thinking, you ARE over-thinking.  Lately I’m using a trick to cut down on over-thinking: ask yourself what your friends would tell you to-worry-about or to-do.  Having just read DECISIVE by Heath and Heath I learned that thinking “outside-in” this way produces better results than thinking “inside-out” i.e., over-thinking.  

3. Get help from people three decades younger than you

They are altruistic enough to be happy to work for pizza.  They don’t make your father’s noise, when they pick up large boxes of books.  They seemingly never tire.  It is impossible for mere manual labor to discourage them.  Don’t be too proud, find their favorite pizza place and place your order. 

4. Remember problems are opportunities 

When I’m moving, the entire moving process I’m worried about how the organization at the end is going to turn out to be a disaster.  *Note* this has never been my experience when moving, but it is a constant gnawing fear while moving.  This time same as always.  However, being organized after the move, I’m loving my latest GTD organization more than previous iterations.  

5. Let go of fear (that you will hate the office you end up with) 

This is a big lesson learned for me. Of course it makes sense, when consolidating two offices into one, you have a bigger library of capabilities to draw on.  And when you move to a new space, there is always something better than the old space.  For example, my old space had poured concrete walls, very tough to hang things on. The new space is sheet rock which is easy to hang pictures and memorabilia.  

The “Where am I going to put all these books?” problem I feared while moving out, became the “Wow these books look great in the living room!” opportunity while moving in.  I was planning on putting the books in boxes in the garage, but my (angel) wife turned out to like them in her living room.  Wheew, dodged a bullet there. 

But, that is the point.  When you move and reorganize, you are always dodging bullets, you can always upgrade, you can always depend on your own (and your angel spouse’s) resourcefulness.  The longer I do GTD, the better I become at making a mess into a masterpiece.  

6. Organize in sequence-layers 

Source: Flickr

Over the years I’ve had many grand designs for optimizing book organization:

  • favorite books within arms reach (visually overwhelming)
  • topical sections (econ, biographies, evolutionary ecology, statistics, etc.) OK, but not that helpful finding books
  • books related to a project in separate piles on the floor 

and many other organizations.  I think this time I’m going to not worry about an “optimal” book organization.  I’m going to let the books organize themselves over time.  Layer 1 was getting the books out of boxes and on to shelves.  Layer 2 was to “balance” out the books on shelves so that they are not packed so tightly as to be difficult to remove.  Layer 3 was to pull out those “aha!” books I’ve purchased because they flipped my “might be pivotal” mental switch.  Layer 4 will be to organize the “aha!” books into clusters of related books.  And … I don’t know what Layer 5 will be … yet.  

Looking back at my walk with GTD, I’ve been organizing in layers the entire time.  David Allen gives us a defined system to implement, and we dutifully make a try … fall short … and if we succeed in having a few aspects of David’s system stick, we move forward tinkering with experiments.  Every once in a while these experiments pay off big (my ginormous conference table desk for example) but most experiments are localize, small, and very focused.  For me, a small focused experiment was to get 100% of the clutter off my desk, out of where my eyes fall when I’m working.  

Over the 3.5 years I’ve been dong GTD the experiments have aggregated to a pastiche of techniques that work.  I’ve had failures (like going 100% into electronic GTD with Omni Focus which was too overwhelming) as well, and I’ve responded to them for the most part with 3×5 card kludges.  

7. These lessons apply in other domains 

“The mess is the masterpiece” occurred to me as I was talking down an overwhelmed entrepreneur a couple weeks ago.  The first problem is no sales, the second problem is gearing up for sales once they start coming, the third problem is living with how you gear up.  Entrepreneurs live in rolling messes, always struggling to keep up, and get results.  The artist Bernard Pras should be the Patron Saint of entrepreneurs.  His pieces like Einstein above, make masterpieces out of messes, just like successful entrepreneurs. 

And, just like people doing GTD.  GTDers not being wealth for the most part, have to make due with the messy pieces of organizing infrastructure that we have, and gradually over time we discover we can evolve the mess into a masterpiece that increases our productivity more than 2x.  And, let us not forget the reduction in stress from knowing our projects are planned out to next actions.  

Conclusions: 

Living through the cycle of organized to disorganized and back can be very stressful.  But, it does not have to be.  Much of the stress comes from over-personalizing change.  From interpreting change as punishment for lack of perfection.  But change is mostly temporary uncertainties piling up.  Looking back at moving changes, I can’t understand why I was so bent out of shape at the time of the moves.  This post is about lessons I’ve learned from my latest post-GTD move, and how I will attempt to preempt stress during future moves.  

bill meade 

Goofy paper tray quest …

Source: Shaunfynn.com

Introduction:

I’ve got the upgraded/new desk, and I’ve got 3 paper trays behind the monitor where I can reach them easily but not see the clutter they generate.  But, … that is not good enough.  I want a kick ass/goofy paper tray like the Shaun Fynn paper tray I adapted to my office desk.  Only Shaun’s paper tray is no longer for sale.  

Saun’s Goofy paper tray adapted by mounting it on the monitor arm on my office desk

I’ve been searching for “paper tray eye candy” “artisan paper tray” “wow paper tray” etc. and THERE IS NOTHING!!!  So, I’ve decided to reach out on RestartGTD.com for nominees for eye candy, artisan, and wow paper trays.  Co teaching rapid prototyping with John Niebergall last semester gives me CAD so I can show you some starter images of what I’m looking for: 

View 1

View 2

View 3

As you can see from the 3 views, I’m looking for something goofy, something asymmetrical, something Frank Lloyd Wright falling-water looking, something Steve Jobs-ish.  And yes, “goofy paper trays” is yet another useless search.  

Got any links for me?  


bill meade 

Perfect GTD Desk +2: Desktopia Redux

D3M 5585

See also: The Perfect GTD Desk +1

See also The Abomination of Deskolation Redeemed 

See also: The Perfect GTD Desk

Introduction:

Perfect GTD desk +1 has been refactored once again.  The above action shot displays several changes:

  • The monitor arm has switched ends of the desk
  • The cable access door in the Ikea Galant Conference Table has been filled in with wood
  • Gave up on mounting the Fujitsu ScanSnap on the monitor arm.  It was cool to look at, but even cool stuff is clutter when you are trying to get work done.  So I resurrected a shipping box and mounted both the ScanSnap and the Brother label printer on the box.  So far so good, the box has not interacted with the chair legs.
  • Screwed the chair mat to the floor in the correct location with 4 2″ drywall screws.  *Bam* no more wandering chair mat!!!
  • A 15.5″ semi-circle has been cut out of the center front of the conference table.
  • To create a 15.5″ radius, the conference table was slid forward until the back edge of the desk was flush with the Galant support frame.
  • I also slid the conference table surface to the right until the left edge of the work surface became flush with the left side of the Galant support frame.  Here’s an action shot of the top left corner of the desk:
  • D3M 5586
  • Power adapter moved from underneath the work surface to Galant table legs.  With diagonally crossing cable ties it was simple to mount the power adapter and then slide it around to readjust it.
  • A cordless remote control light switch was added (mid right hand of the back of the iMac) controlling the keyboard light, the floor lamp over the desk, and the floor lamp in the corner of the office.
  • The “un-drawer” was shifted left and canted at a diagonal angle from lower left hand corner of the desk, to upper right hand corner.  This removes the un-drawer from constant collisions with knees.
  • The purpose of the undrawer is to hold all the items that need to be at hand, but that clutter up the desk surface.  I have stapler, tape dispenser, utility knife, a 10 port USB hub, flash light, and my Plantronic USB headset (wireless headsets suck!).
  • Action shots:

  • USB and power were added to the right hand end of the desk (form the semi-circle side of the desk).  While I wanted usb and power plugs available, I need them to be out of sight, and they can’t be mounted under the surface without cables working their way out with gravity.  So I turned both poet and USB adapters 90 degrees and mounted them with cable ties and cable tie anchors.
  • Action shot:


 Results:

When I sit at my desk now, I’m in the semi-circle and can rest both elbows on the work surface at all times.  I can also reach a much larger proportion of the work surface.  I especially noticed the altered surface to volume ratio of the desk when I wiped it down with Windex to shoot the pictures in this blog post.  Standing in the semi-circle it is easy to wipe down the entire surface of the table.

When people try the desk out, the first word that comes out of their mouths is “Game changer!” and then “I’m going to do this to my desk!”

The monitor arm now swings the iMac completely out of the way of the desk.  Action shot:

And when sitting at the desk, it looks like this:

D3M 5584

How To Section:

I started with this configuration:

D3M 5567

This worked OK, except that it began to bug me that the cable access door in the work surface did not do anything.  If a feature is not doing work then it is clutter by definition.  So I stripped the monitor arm off the desk, removed the power outlet and the IKEA cable management baskets, and then the un-drawer which you can just see peeking out under the work surface by the red mouse.

Then I detached the work surface, and laid under the desk sliding the surface to different places and then seeing how it *felt* from beneath and above the desk.  I had the idea to slide the desk forward and to the right to maximize the work surface overhang.

Next I started drawing curves on the surface of the desk.  Because it is a whiteboard, I was able to draw, look, erase, redraw, and play with the shape in my mind.  I like the idea of reshaping the desk with bulbous organic curves at the corners like this:

NewImageSource: Modenus.com

But, I was too chicken to cut very much out of the desk.  Because desks are experience goods, you can’t think your way to what you will love.  You have to generate and test.  So I decided to start simply with a semi-circle cut out.  Starting out the project looked like this (mr. batik supervising):

I decided to cut the cable access door plug from the semi circle and marked it with whiteboard marker.  Then I drew a 15.5″ radius semi-circle from the measured center of the front edge of the work surface.  Then cutting began with a jig saw and after the semicircle was cut out, I hustled the iMac back on to the left side of the desk this time.  I don’t know why I tried the left side of the desk.  Just happened that way.  At this point the project looked like this

Once I re-mounted the iMac on the monitor arm, I was delighted to see that shifting the work surface forward created an opening between the desk and the wall, that allows the iMac to swing behind the far edge of the work surface.  This leaves the work surface completely clear for jotting down ideas, spreading out 3×5 cards, etc.  I like the additional openness of this configuration over where I started from.  Gratifying to contemplate.

At this point I cut a grommet hole out of the semi circle and then used steel straps to mount the cable access door plug and grommet hole plug from the under side of the desk.  Action shot (sorry it is blurry):

Then I filled in all the gaps around the plugs with white plastic wood which I was very delighted to discover at HomeDepot.com.  Much sanding and re-filling and re-sanding ensued. And once I got the work surface to be “not terrible” I moved on to finishing the edge the jig saw cut.

I was surprised at how easily iron-on melamine edging went on.  Get a clothes iron, cut the length of edging you need, then slowly iron the melamine edge on to the work surface.  Took about 30 minutes from start to cleaned up.  And I’m very delighted with how the edging is staying attached.

Partial component list for desk:

Support RestartGTD by buying at Amazon.com with this link!

Perfect GTD desk +1

Screenshot 12 19 12 4 53 PM 2

Introduction:

Confession:

I’ve been holding out on http://RestartGTD.com.  :-(

I’ve been working since April 2012 on a successor to my “The Perfect GETTING THINGS DONE (GTD) Desk” post (which is the most read post on this blog).  1.5 years after we moved to the Portland area, Beth and I bought a house which allowed significant expansion of the good enough home office desk.

As a sufferer of chronic rhinosinusitis, I’ve found the need to keep facial tissues close at hand.  In fact, VERY close at hand as tissues go from box, to my face, to the trash in one choreographed motion.  So in the new house I have a GTD trash can.

And

my desk work surface is expanded from a merely “big” desk into an “Ikea conference table” sized desk that is 77″x43″.  I bought yet another Innovative 7500-HD-1500 monitor arm to hold up my 27″ iMac i5. I know that $260 for an arm seems exorbitant, but getting the computer off the desk is the best money you can spend in taking back your desk.

Also, if you’ve got a wall that you are facing when you work, you can get a monitor arm for $30 that will be great for giving you back your desk.

Anyway, to be optimal, I should have gone to IKEA and bought a conference table surface for $65 in the “as is section” but, I did not realize that the components I needed for my upgrade of “The Perfect GETTING THINGS DONE (GTD) Desk” would be available in the as-is department.  So, instead of saving 35%, I bought the full price $229 brand new white GALANT conference table (instead of the $65 as is white conference table).  I bought new adjustable Galant A-legs for $15 each, but in thinking about it I could have gotten away with buying 2 new fixed length Galant A-legs for $10 each and then 2 adjustable legs.

Driver’s eye-view of the Perfect GTD desk +1

OK Bill, what is behind the monitor?

Well, as usual, there is a lot going on behind the iMac.  I’ve used cable ties to attach a 3-tier paper tray to the Innovative hd monitor arm.  *Note* because the iMac and paper tray are hanging off the monitor arm, there is an angle that I had to compensate for with the paper tray.  Why? Because if you can’t get the paper tray approximately level, then you’ll have paper splashing on to your work surface.  = Unpleasant.  Here is a shot of the angle compensating cable tie.

And the indispensable ScanSnap S1500 rests on the base of the monitor arm. It is visible, but not when I’m looking at 3×5 cards on my desk.

OK, what is going on under the desk

Excellent question!  Here is a macro shot of the under side of the desk:

Once again I’ve availed myself of IKEA to provide pseudo drawer space as well as plain Signum cable management (US$10).  The Galant cable management tray (US$5) works as a static drawer.  Desk tools that conventionally clutter up desk surfaces are verboten in my conception of the perfect GTD desk.  So, I mounted the Galant cable tray a bit back from the front of the desk (to avoid hitting it with my knees), but still in easy raeachability.

In addition to microfiber cloth, stapler, and tape dispenser which are immediately available, I also keep a pocket knife and an eraser readily at hand.

Crayons?  You think Crayons are cool?

Well, in short, … I don’t know what to think about crayons.  Crayons come with memories, fun, and … crayon mess:

NewImage

Source: MissionMission.org

which … I’d forgotten about since I was 5.  But, still, writing on an IKEA conference table with Crayons™ is a great option if you are into crayons.  They come off with Scotch-Brite No SCRATCH sponges and Windex.

Screenshot 12 20 12 11 34 AM

Crayon mind mapping
(about moving ERP into b-education)
48 years after giving up crayons!

I felt giddy playing with crayons as a 53 year old!  The crappy wax mess that falls off the crayons, the problem of sharpening a crayon, the inevitable anger resulting from trying to sharpen a crayon in a pencil sharpener, the flash back to the 64 crayon set that had a sharpener in it (At least until you broke the first crayon off).  I found myself thinking about all the downsides of crayons as a dumb smile came over my face and I created a complex mind map that felt “just a little bit permanent.”

Buy crayons, write on your IKEA conference table, undo all the art formerly-known-as-damage, with a Scotch-Brite pad and Windex.  Fondly remember the voice of your mom yelling at you about using crayon on the table/wall/sibling.  You own the conference table, you can do with it whatever you want!!  Fun memories!

Improvements

First and foremost, except for legs, you can make-do in building your desk by shopping the AS-IS department at IKEA.  This will peel about 35% off the total cost.

Second: grommet management.  Move the grommets away from where you will work most at your desk.  For me that is working at the computer.  And, place Signum cable grommets out of sight if you can.  You can’t control where the cable runs are, but you can control the wires between cable runs and move them out of sight.

Screenshot 12 20 12 11 22 AM 2

Third: Find a work surface that does not have a pre-cut grommet in it.  I like the simplicity of IKEA parts, but I was forced to remove the monitor arm and re-place it through the steel support deck, because the particle board of the surface was not able to carry the 50 pound load of the monitor arm and items hanging from it.

Thank you.  Thank you.  Thank you for 2012!!!

So we are just almost exactly at 1 year into http:restartgtd.com and about 130,000 page views.  The blog really started with the “The Perfect GETTING THINGS DONE (GTD) Desk” post which Lifehacker kindly picked up, and we are about at the end of the year with this Perfect GTD desk +1 post.  I’d like to thank everyone who has read, everyone who has commented, and especially everyone who has emailed back channel to [email protected] this year.  I’ve had a blast opening my GTD kimono.  And it has been fun sharing the GTD love and enthusiasm with you.

May this year bring a happier, more robust recovery, and smarter GTD thinking than any year going before.  You guys reading this rock.  Let me know how I can help in 2013!

Support RestartGTD by buying at Amazon.com from this link!


bill meade

GTD Bricolage De Jure

Introduction:

Having bought a house recently, cash flow has been at something of a premium.  So, whenever I can find a way to bing a fun improvement to my desk for no out of pocket costs, I’m very focused.  Today I had the idea that I could re-purpose the stand from my 27″ iMac, which looks like this: 

Source: Bookyard.com

to be an over desk shelf for my most excellent ScanSnap S1500M.  Here is the inverted stand on the edge of my “progeny of the Perfect GTD desk” which I will someday, post about.  

As every angle of the iMac stand is “out of plane” to attach the stand to my desk required an evolutionary step beyond my normal double sided sticky tape technology platform.  So instead of tape, I used drywall screws.  If you look in the following picture you will see 5 1″ black drywall screws loosely holding the stand to the under side of the desk, and around the corner from them, you will see two 2″ drywall screws holding the platform (was base, is now the shelf) parallel to the desk.  

Note, I am laying on the floor looking up at the underside of my desk in this shot. 

Here is another angle looking across the desk: 

And here is another angle looking across the face of the desk at the shelf and the monitor: 

Apologies for the 24″ iMac growing out of the back of the shelf in this picture.  *Note* if you have a spare 2.8 GHZ iMac motherboard from the early 2008 24″ iMac, email me at [email protected] otherwise I’m going to have to scrap this machine.  :-( 

Moment of silence 

… 

Now, back to bricolage.  Here is a shot of the ScanSnap on the shelf closed up in hibernation mode.  

And here is the scanner open and ready for action! 

More with less! 

I may have to employ double sided sticky tape to make sure the scanner does not walk off the shelf.  But I’m going to wait and see if the built in non-skid strip is enough.  I don’t like the idea of sticking my scanner down because the best way to get people to understand how great a scanner is, is to take my scanner and let friends scan their documents.  Something about scanning your own documents activates a neural pathway that description misses.  So, I’d like to preserve my free range ScanSnap if I can.  


bill meade 


Random 3×5 card/desk … like water cam

Random 3×5 card/desk … like water cam

I’ve got a great GTD flow going this morning!  Off to school for meetings this afternoon, but I have the 3×5 card + upgraded desk working together.  When I’m working at this desk, I’m smiling.  

How do you feel about your desk?  

Have a great flow-filled GTD afternoon!!!! 

bill meade 

p.s., Here is what happens to the cards when I move to the other office: Step 1 gathering … 

Step 2: keeping separate 

Call for …

Source: SameDayGuy.com

Desk Before Pictures!!!! 

There has been a fair amount of hinting that readers of RestartGTD are interested in seeing GTD desk pictures, and sometimes even in sharing desk pictures.  I’ve put my before/after up, and the before/after of one other RestartGTD reader.   Now let’s everyone show everyone theirs!  

Find a picture of your desk before GTD, or take a picture of your desk when off the GTD wagon, then post the picture in the comments to this blog entry.  Blog readers then can chime in with comments.  Commiserate about desk problems.  And generally encourage and troubleshoot.  

I love doing desk makeovers, so I’ll chime in where I think I can add something. For example,

If I were presented with the above desk, then I would advise the “Brutal GTD reference filing cut over” hereafter BGTDRFCO:

Step 1: Go to CostCo and get 5 large boxes.
Step 2: Get a rolling dumpster.  
Step 3: Wait for the weekend (best time of year for the BGTDRFCO is holiday in December, the only time when people will leave you alone at the office)
Step 4: Go through the piles on the desk, left to right, pick up each document and ask “Will there ever be a next action?”

  • If yes, and the action is immediate, put the document into one of the five boxes labeled “In” 
  • If yes, but the action is not immediate, put the document in one of the five boxes labeled “To Scan #” where # goes from 1 to N for all the boxes needed to hold scanned documents. 
  • If there will never be a next action, then put the document in the rolling dumpster. 

Step 5: Move through the entire pile of paper on, in, and around the desk dumping, inbox-ing, or to-scanning all the documents. 
Step 5: Get:

Step 6: Get the scanner working with Evernote:

  • If you have a single-pass dual-sided scanner at work (most workplaces do) then set up scan to email to email to your evernote in-box email address.
  • If you have a desktop scanner, set up the “Scan to Evernote” function to use PDF without doing optical character recognition (OCR). 
  • Set up a clear space to put your “To Scan” box on one side of the scanner, and a second clear space (use another of the 5 boxes labeled “Scanned #”) to build up your pile of scanned documents.  

Step 7: Start on the “To Scan #” box that is on top.  Take each document out, …

  • If the document is not precious, then cut the staple off the top left corner, and feed the document into your scanner, scan it, and then deposit the document in the “Scanned #” box. 
  • Repeat until all the documents in “To Scan” labeled boxes have been scanned.  Change the box labels from “To Scan #” to “Scanned” as you scan documents.  This step took me 3.5 hrs a day for 4 days to import my first 17,500 pdf documents into Evernote.  
  • Store the “Scanned #” boxes if you are paranoid, or recycle if you have that “This is going to work! Uplifting feeling after completing your scanning.” 

Step 8: Put the “In” box on your desk.  You can now scan through the box and apply David Allen’s “processing” to get the documents where they belong.  

I’ll post my current desk in a comment for others to share how they would modify/refine/replace.  But it won’t be until tomorrow!! 

Have a great day! 


bill meade