Introduction:
This post will step-by-step Macintosh users through getting our most excellent ScanSnap iX500 scanners, to scan directly to our smart phones.
This journey began 2 posts ago with the discovery that when you set up ScanToPhone the first thing Fujitsu’s programmers want you to do is to update the firmware on your scanner. Then, 1 post ago I explored why anyone would want to scan directly to phone. Mostly, I just decided to close my eyes and try setting this up.
OK, this tutorial will assume that you have gone through how to update your firmware step by step and you now have your iX500 scanner all cutting edge and ready to go.
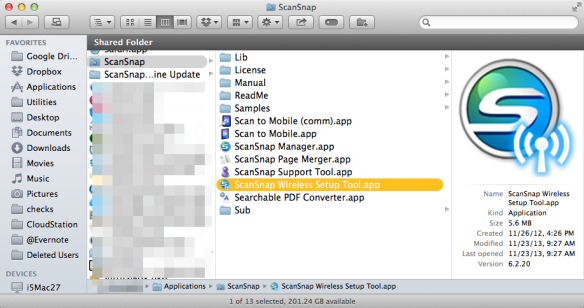
Step 1: Run “ScanSnap Wireless Setup Tool.app”
Go to /Applications/ScanSnap/ScanSnap Wireless Setup Tool.app and double click. Your should see this in your /Applications/ScanSnap folder:
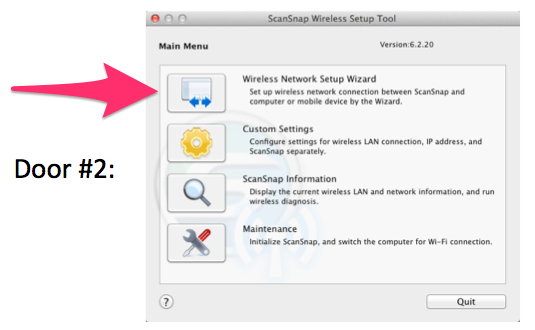
Step 2: See which door opens up. Door #1, Door #2, or Door #3
If you see Door #1 this is good! You either have a Ph.D. (license to be absent-minded), you have not turned on your ScanSnap iX500, or both. Next action? Open the ScanSnap iX500 so that it turns on.
Fantastic, you are ready to implement your X clicks and to begin scanning from ScanSnap to phone. **Note** If you saw Door #1 and then opened your ScanSnap, you will see Door #2 in about 2 seconds.
Oops, you need to update your firmware before you can set up ScanToPhone. Go to my step-by-step tutorial “Think Like A Fujitsu Programmer To Upgrade your iX500 Firmware“.
Step 3: Click “Wireless Network Setup Wizard” in Door #2
… and then follow the dialogs along …
… and find your network and click on it, then follow the dialog …
… then enter your security key and follow the dialog …
… then you will be informed that your ScanSnap is successfully connected, click on OK to continue …
… you will be shown a dialog like this to indicate you have successfully connected your ScanSnap wirelessly …
… next you will be asked if you want to scan to your mobile device (phone), click “OK” …
… after you click “Yes” on the previous dialog you will see a new dialog that will send us from configuring the iX500, to installing Fujitsu’s phone app …
… so go to the iOS or Android store and download the free ScanSnap program to your phone …
… once you have ScanSnap Connect Application installed on your phone you can click “Yes” on your Mac, (for having installed the app) and then click Continue …
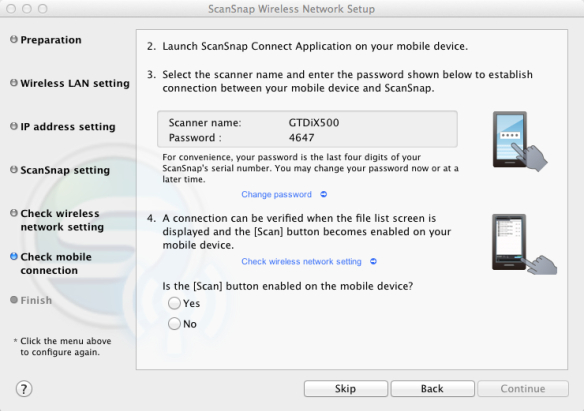
… the next dialog you see shows you two critical facts:
(1) Scanner Network Name and = GTDiX500 for my scanner
(2) Scanner Network Password = 4674 for my password <- write this down
Now you are ready to open the ScanSnap app on your phone (see Appendix A for step by step instructions for installation on an Android phone) …
… and then click “Yes” and “Continue” in the dialog …

… and the Macintosh part of setup is almost done! …
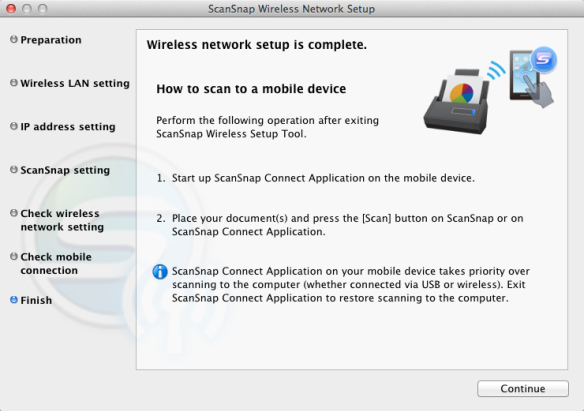
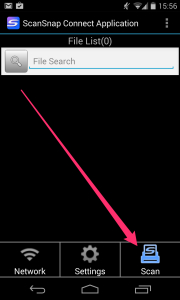
… Click finish and then the Macintosh side of ScanToPhone setup is complete. Now pick your phone up and open the ScanSnap Connect App, then your phone will find your ScanSnap and ask you for your four digit password … it should look like this …
Whoa, where was that password set? <<Panic>> Four digits? But, … I’ve got all my fingers … I’m confused!
Fear not! Setups involving two devices, are the worst. So take a chill pill and scroll up three dialog boxes. My password is 4647, your password will be different, but will be in that same dialog. Now wait, you wrote your password down right? :-)
… enter your password phone your app screen will look like this …
… **note** the blue scanner icon in the lower right-hand corner. This is the indicator that your scanner is read to scan to your phone. Put your business card into your iX500 and then touch the blue icon on your phone …
… like magic, your phone will have a PDF scan of your business card. Mine looked like this …
… if all went well, you should be done and the happy owner of a ScanToPhone new core competence. For maximum payoff, use this capability to “Wow” your peers and make them say “Whoa, I’ve never seen anything like it!”
Or, if this did not work for you, contact me, or at least vote on why it did not work below:
Enjoy!
Support RestartGTD by buying at Amazon with this link!
bill meade
Data researcher seeking team
see http://goo.gl/JkkEI8
Appendix A: Installing Scansnap Connect Application on an Android phone
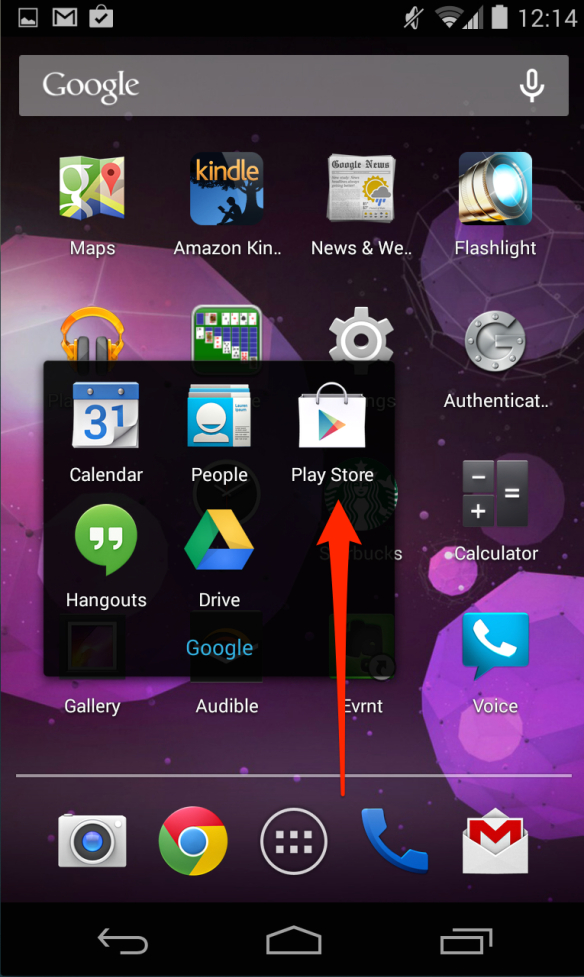
Go to Google Play Store:
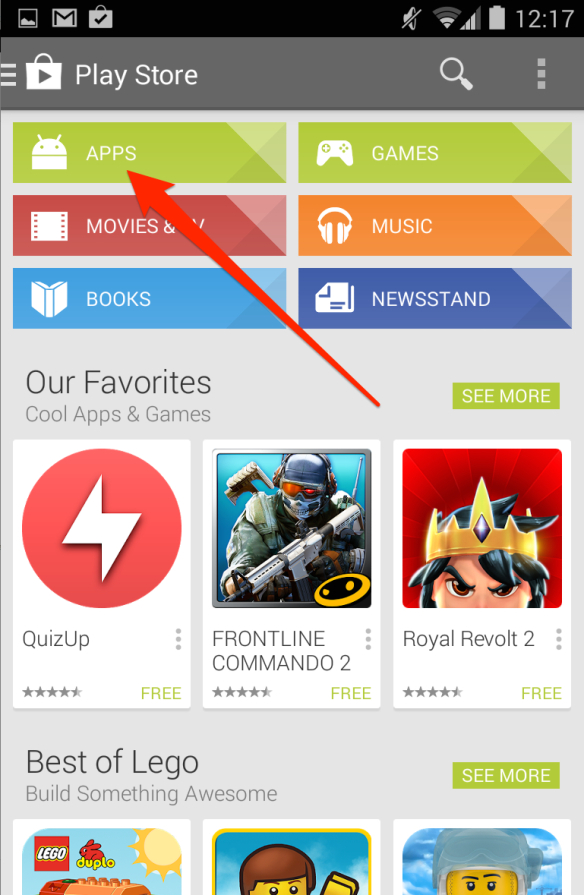
… then click on “Apps” …
… then search for “ScanSnap Connect Application” and choose “INSTALL” …
… the app will then install …
… and once installed will give you the option to open or uninstall …